There’s just nothing in the world quite like a rustic dessert, is there? Something you can throw together without fuss but that tastes like it took hours! That’s exactly what we have here with this simple, comforting Cherry Oat Crumble. Honestly, the first time I tested this, I was floored by how the crisp oat topping gave such a fantastic snap against the soft, bubbly cherry filling. It’s pure heaven. Believe me, adapting recipes to make them faster and easier is kind of my specialty, but I promise this version keeps all the cozy flavor you want. It’s ready in under an hour too!
Why This Cherry Oat Crumble Recipe Works So Well
This isn’t just another fruit dessert; it’s a weeknight savior that tastes like the weekend. We worked hard to land on the perfect texture for our Cherry Oat Crumble, and I think we nailed it. You’ll want to keep coming back to this one again and again.
- It whips up fast! Seriously, the prep time is less than 20 minutes, which is amazing.
- That sweet and tart filling is just pure comfort food in a dish.
- The contrast between the thick, bubbly cherries and that crunchy oat topping? Unbeatable.
- It comes together with basic pantry staples, so you don’t need a special grocery run.
These simple steps really show why having reliable recipes like this one is so important in our kitchens. For more pointers on getting those textures just right, you can check out some of my thoughts on baking perfect textures!
Gathering Ingredients for Your Cherry Oat Crumble
Alright, let’s talk supplies! Getting the right ingredients ready before you even preheat the oven makes the whole process smoother. Since this is a simple dessert, we want everything measured out perfectly. It’s especially important that your butter for the topping is nice and cold—that’s our secret weapon for maximum crunch!
We’ve broken everything down so you can easily organize your countertop before starting. If you’re curious about which salt works best for desserts (hint: it really matters!), you might want to check out my thoughts on different kinds of salt!
For the Cherry Filling
If fresh cherries aren’t exactly easy to find where you are, don’t stress! This works beautifully with frozen, pitted cherries. Just toss them in straight from the freezer—no need to thaw first! That little bit of extra cold helps keep the filling from getting soupy too fast.
- 3 cups cherries (these need to be pitted, whether they are fresh or frozen!)
- 1/2 cup granulated sugar
- 1 tbsp cornstarch (this is what thickens up all those yummy juices)
- 1 tsp lemon juice (just a splash to brighten the flavor)
- 1/2 tsp vanilla extract
For the Oat Crumble Topping
This topping is where the magic happens, so please, pay attention to the butter! It absolutely must be cold and cubed. If your kitchen is already warm, give those butter cubes a quick chill in the freezer for five minutes before you start rubbing them in. Cold butter equals light, sandy crumbs!
- 3/4 cup rolled oats (use the regular kind, not the instant stuff)
- 1/2 cup all-purpose flour
- 1/3 cup brown sugar (it adds that nice caramelized note)
- 1/4 tsp cinnamon
- 1/4 cup cold unsalted butter, cubed
Essential Equipment for Making Cherry Oat Crumble
You sure don’t need a fancy setup for this recipe, which is another reason I love it so much! No stand mixers or complex tools required here. Having these basic items ready means you can transition straight from mixing the filling to whipping up the topping without searching around the kitchen.
I recommend getting one sturdy baking dish—I usually grab an 8×8 inch square or a medium oval dish. Make sure it’s deep enough to hold the fruit and the thick oat topping without bubbling over when it bakes! That’s always a disaster waiting to happen, trust me.
You’ll also need a couple of good mixing bowls. One for tossing those lovely cherries together, and another, slightly larger one, specifically for making that crumbly topping. If you have dry hands, your fingers will work beautifully to combine the butter into the oats!
Step-by-Step Instructions for Perfect Cherry Oat Crumble
Now for the fun part—putting it all together! Since this is such a straightforward Cherry Oat Crumble, the baking order matters little, but we still want to be methodical so we don’t end up with a soggy bottom. I always start by heating the oven because that takes the longest!
- First thing on the agenda: Preheat your oven to 375\u00b0F (190\u00b0C). Get that heat going right away so it’s ready when you are.
- In the first bowl, gently toss together the cherries, sugar, cornstarch, lemon juice, and vanilla extract. You don’t want to mash the fruit, just coat it nicely.
- Spread that beautiful cherry mixture evenly into your prepared baking dish. Try to get the fruit into an even layer!
- Now, switch bowls for the topping! Combine the rolled oats, flour, brown sugar, and cinnamon in your second mixing bowl. Give them a quick whisk until they look uniform.
- This part is crucial for that amazing texture: Rub the cold, cubed butter into the dry ingredients. I always use my fingertips—squish it and rub it between your thumbs and fingers until it looks like coarse, uneven crumbs. If you need more on this technique, check out my tips on getting the perfect crumble!
- Sprinkle that crumbly topping evenly over the fruit layer. Don’t press it down; we want it loose and airy!
- Time for the heat! Bake for about 35 to 40 minutes. You’ll know it’s done when the filling is bubbling up around the edges and the oat topping is perfectly golden brown. If you want to see other fantastic crumble ideas, you can sneak a peek at this BBC recipe too.
- Patience, my friend! Let the crumble cool slightly before serving. This lets the juices set up just a bit so the whole thing doesn’t run all over your plate. Enjoy that crispness while it’s hot!
Tips for Success with Your Cherry Oat Crumble
Even though this is a simple recipe, I want everyone who tries it to have fantastic results! Baking fruit, especially juicy fruit like cherries, can sometimes lead to a watery bottom layer. That’s the most common failure point, but we can stop it dead in its tracks with a couple of insider secrets.
I spent ages messing with recipes until I figured out how little changes make a massive difference. If you want that beautiful textural contrast we talked about, keep these tips front of mind!
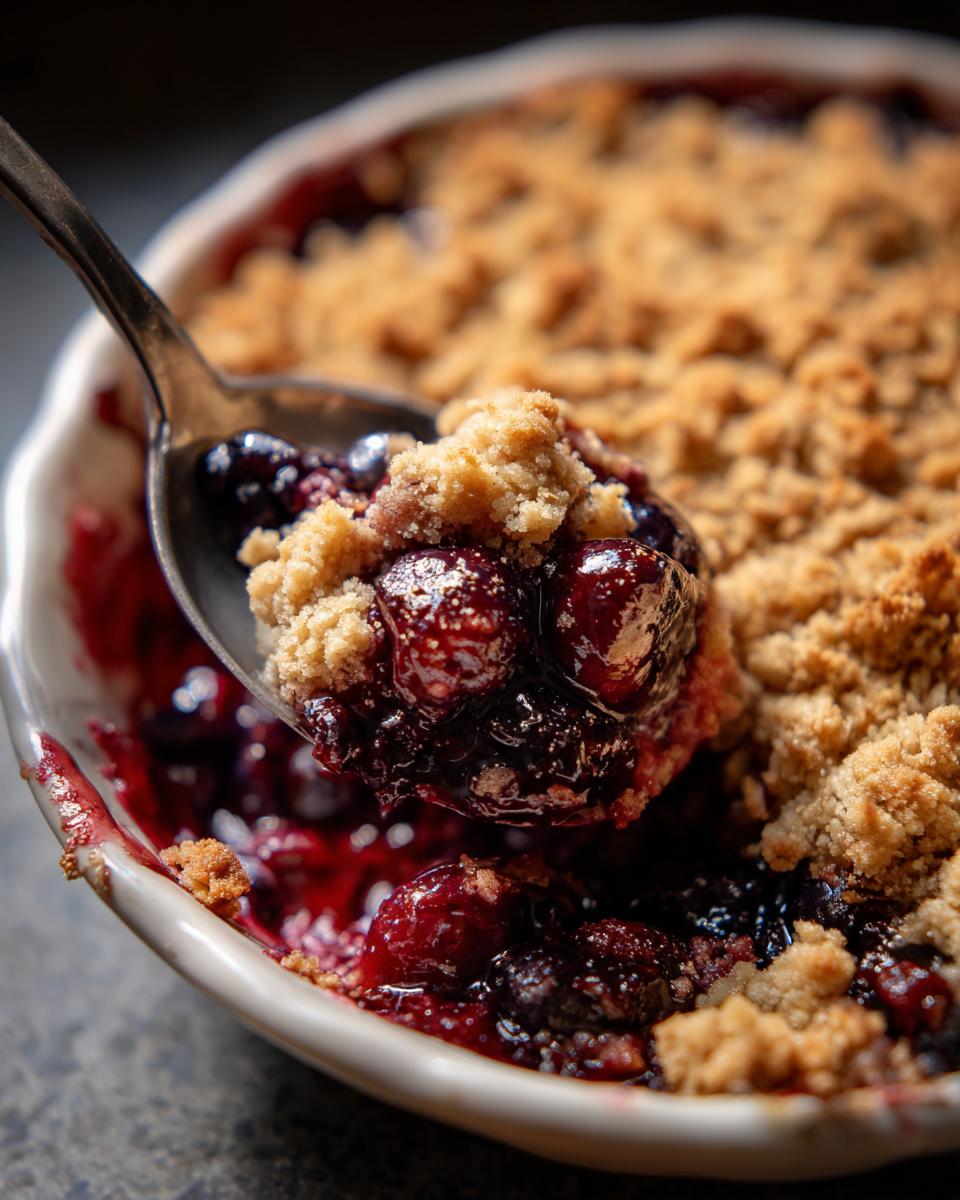
- Combat the Soggy Bottom: That cornstarch is your best friend here, but you can give it extra support. If you’re worried about juice seeping up, sprinkle a very thin layer of dry oats—about two tablespoons—directly onto the fruit before adding the main topping. It acts like a tiny sponge!
- Keep Your Oats Cool: I cannot stress this enough: cold butter is non-negotiable for that crumbly texture. If your topping mixture starts feeling warm or greasy while you’re mixing it, just pop the whole bowl into the fridge for ten minutes. A warm topping melts into the fruit instead of staying loose and crisp on top.
- Don’t Crowd the Pan: Make sure your 3 cups of cherry filling isn’t piled too high in your baking dish. If the fruit layer is much more than an inch deep, it takes forever to heat through, and the top will burn before the center bubbles. Stick to the measurements for even baking.
- Go for Golden Brown: Don’t pull the dessert out just because the top looks lightly toasted. You need to see that filling actively bubbling around the sides. That’s proof the thickener has activated and the fruit is hot all the way through.
For those of you who nail the baking part but struggle to keep bread and cakes soft during storage, you might find some useful pointers over on my guide about keeping baked goods moist. It’s a whole different science, but humidity control is key everywhere!
Ingredient Notes and Substitution Ideas for Cherry Oat Crumble
Part of making a great recipe your own is knowing what you can smartly swap out! While this Cherry Oat Crumble sings when made with fresh, sweet cherries, it’s adaptable, which is what I love most about comfort home baking. If you are working with apples and cranberries, that works too, but you’ll want to treat them slightly differently.
The biggest change comes if you rely on canned cherries for a quick fix. If you use canned fruit, drain off *most* of the syrup, but definitely dial back that granulated sugar in the filling by about half. Canned fruit is usually packed in heavy syrup, and we don’t want this dessert tasting like candy! For those gorgeous sour cherry recipes, you might actually need a little extra sugar to balance that tartness, so taste as you go there.
If you are going for a slightly healthier take, you can swap half the all-purpose flour in the topping for whole wheat flour. It adds a lovely nutty depth to the crumble!
Serving Suggestions for This Cherry Oat Crumble
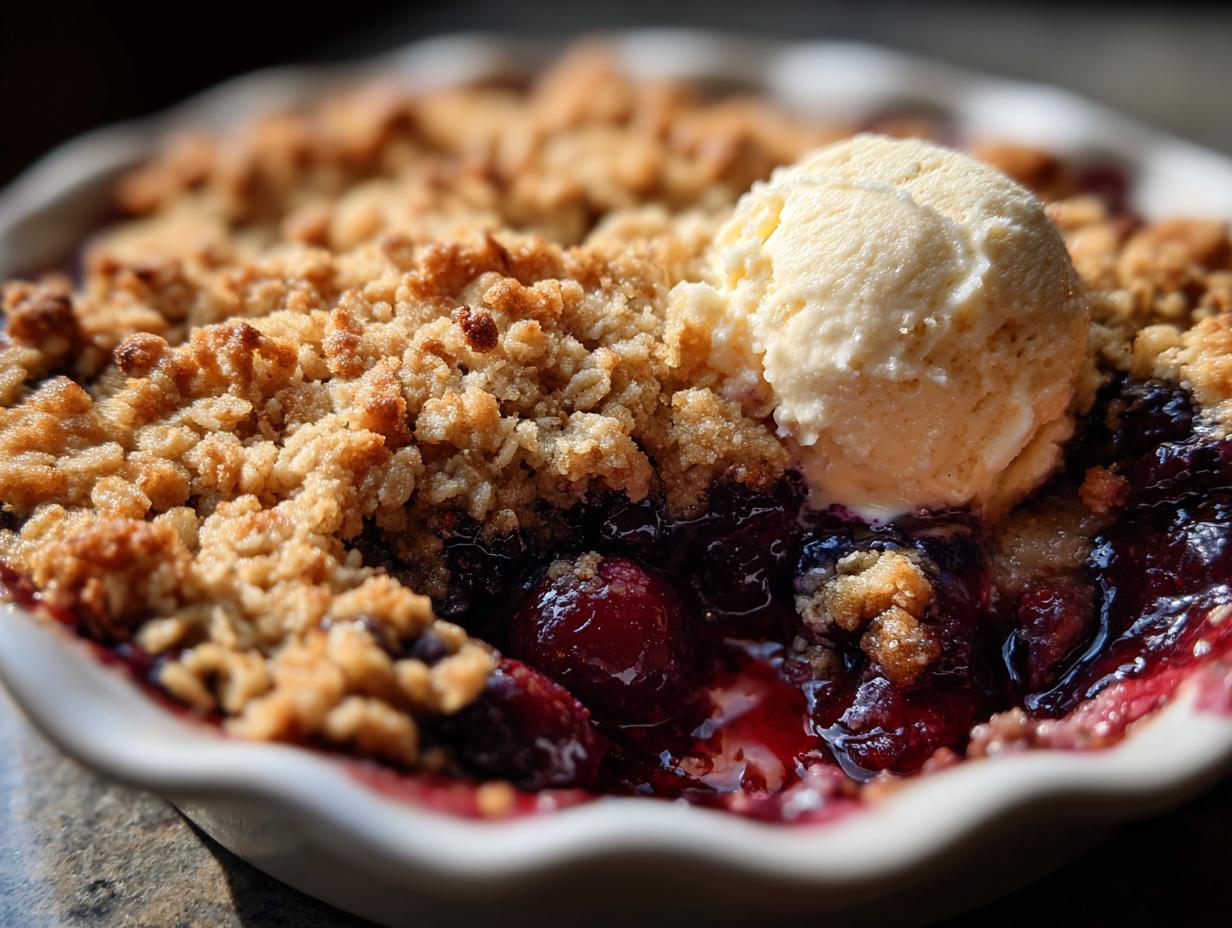
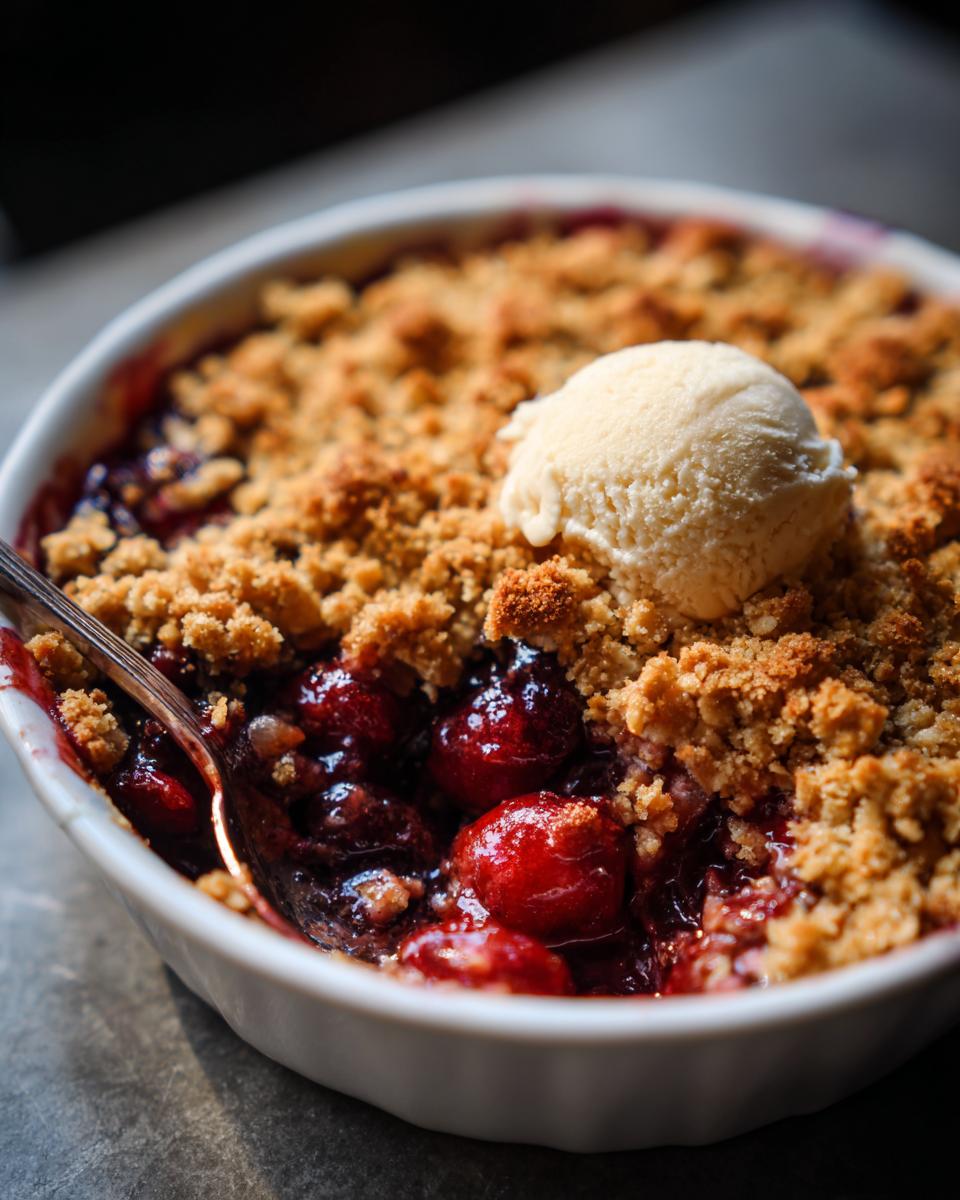
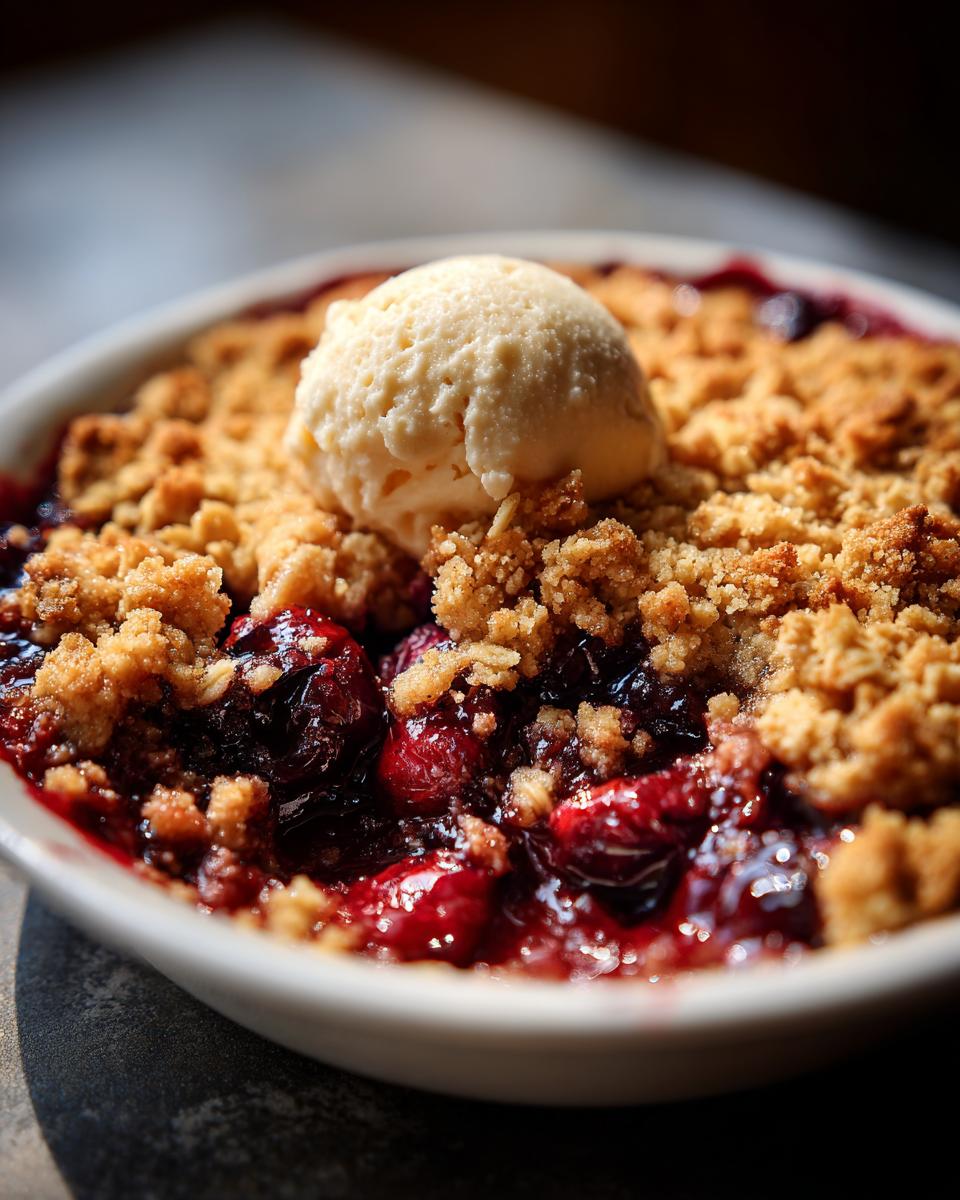
You’ve just pulled a piping hot, bubbling dish out of the oven. What do you do next? Well, for my family, the only way to truly enjoy a warm fruit bake is with something cool and creamy melting right over the top! It cuts through the richness of the oat topping beautifully.
My absolute favorite accompaniment is a big scoop of good vanilla bean ice cream. The way the cold ice cream instantly meets the hot cherry juices and starts to melt into a perfect sweet sauce? That’s peak comfort food, I swear. It transforms a simple dessert into something really decadent.
But if you aren’t an ice cream person, don’t worry! A generous dollop of freshly whipped heavy cream, sweetening it with just a touch of powdered sugar, is fantastic. You want it slightly unsweetened so it offers a nice, neutral backdrop to the sweetness of the fruit.
This bake fits perfectly into any collection of fruit-centric dessert recipes, especially when the market is overflowing with fresh fruit. Serve it warm after dinner, or even let it cool completely and enjoy a slice the next morning with your coffee—I won’t judge! It’s just that versatile.
Storing and Reheating Your Cherry Oat Crumble
The best part about a fruit crumble is that they often taste just as good the next day, maybe even better once the flavors have really married overnight! Luckily, loving this Cherry Oat Crumble leftovers is easy because storing it is a breeze.
You really should aim to eat most of it the day you make it, of course, because that fresh, hot crispness is hard to beat. But life happens, and we need storage solutions!
Storage Tips
If you have any left after dessert, you need to contain that moisture so the topping doesn’t get totally soggy overnight. Once the dish has cooled down a bit (maybe 30 minutes after it comes out of the oven), cover the entire baking dish tightly with plastic wrap or transfer the leftovers into an airtight container.
You can safely keep this at room temperature for about a day if your kitchen isn’t too warm. After that, or if your kitchen is a bit humid, tuck it into the fridge. It should easily last three to four days tucked away safely in the cold. Don’t worry if the topping feels a little soft after refrigeration; that’s normal, and we can fix it!
The Best Way to Reheat
Okay, this is the most important part of storage: REHEATING. If you try to microwave this, you’ll end up with a warm, mushy, cherry sadness puddle. We want that wonderful crunch back, remember?
The oven is the only way to go for reviving that golden oat topping! Set your oven—or toaster oven, if you only have a small piece left—to about 350\u00b0F (175\u00b0C). Place your serving (or the whole dish, carefully!) onto a baking sheet or into an oven-safe dish.
Let it warm up for about 10 to 15 minutes. You’ll know it’s ready when the fruit filling is steaming hot and you hear that delicious bubbling sound again. If you are reheating an individual portion, it might only take 7 or 8 minutes. This quick blast of dry heat crisps up the oats beautifully, making your leftovers taste nearly as good as when they first came out!
Frequently Asked Questions About Cherry Oat Crumble
I get so many questions whenever I share a new baking adaptation, and that totally makes sense! We all want to make sure we get it perfect the first time. Here are a few things folks ask me most often about making this fruit bake. If you have other questions, drop them in the comments!
Can I use different fruit in this crumble recipe?
Absolutely, yes! That’s the beauty of a good oat topping; it works with almost anything you have on hand that needs baking. You can easily swap out the cherries for a mix of rhubarb and strawberries, or go for a classic apple dessert. If you try apples recipes, you might need an extra tablespoon of cornstarch since apples release a little less juice than cherries, but generally, a pound-for-pound swap is easy! If you’re leaning toward tartness, I’ve even used a mix of berries and a few sour cherries with great results.
How can I make this Cherry Oat Crumble healthier?
That’s an excellent question! If you’re trying to keep things on the lighter side, there are a couple of easy adjustments you can make without ruining the texture. For starters, you should definitely cut the granulated sugar in the filling by about a quarter. The cherries are naturally sweet enough, and reducing that helps keep this in the realm of healthy cherry recipes. Also, as I mentioned earlier, swapping that all-purpose flour in the topping for whole wheat flour adds fiber and a nice, earthy flavor. You won’t even notice a difference once it’s baked up nicely!
My oat topping didn’t brown much, what happened?
Oh, that happens sometimes, especially if your kitchen isn’t super warm! Usually, this means your butter wasn’t cold enough, or you didn’t have enough sugar in the topping mixture, as sugar helps with that beautiful browning reaction. Brown sugar does most of the heavy lifting here, so make sure you measured it correctly. If you notice the fruit is bubbling but the top is still pale by the 35-minute mark, don’t panic! Just slide the rack up a notch closer to the top heating element for the last five minutes. Keep a close eye on it though, since it can go from pale to burnt really fast at the end!
Can I use canned cherry pie filling instead of fresh/frozen cherries?
You definitely can use canned cherry recipes if you’re really in a pinch! But you have to adjust for the extra sugar and thickener already in that filling. For every 3 cups of thick canned pie filling you use, skip the granulated sugar, skip the cornstarch, and only use the lemon juice and vanilla. That filling is already sweet and stabilized, so adding more sugar or cornstarch will just make it overly gummy or sickly sweet. Taste your canned filling first, and then adjust accordingly!

Cherry Oat Crumble
Equipment
- Baking dish
- Mixing Bowls
Ingredients
Cherry Filling
- 3 cups cherries fresh or frozen, pitted
- 1/2 cup granulated sugar
- 1 tbsp cornstarch
- 1 tsp lemon juice
- 1/2 tsp vanilla extract
Oat Crumble Topping
- 3/4 cup rolled oats
- 1/2 cup all-purpose flour
- 1/3 cup brown sugar
- 1/4 tsp cinnamon
- 1/4 cup cold unsalted butter cubed
Instructions
- Preheat your oven to 375°F (190°C).
- In a bowl, mix the cherries, sugar, cornstarch, lemon juice, and vanilla extract.
- Spread the cherry mixture evenly in a baking dish.
- In a separate bowl, combine the oats, flour, brown sugar, and cinnamon.
- Rub the cold butter into the dry ingredients using your fingers until the mixture looks crumbly.
- Sprinkle the topping evenly over the cherries.
- Bake for 35 to 40 minutes, or until the filling is bubbly and the topping is golden brown.
- Let the crumble cool slightly before you serve it.