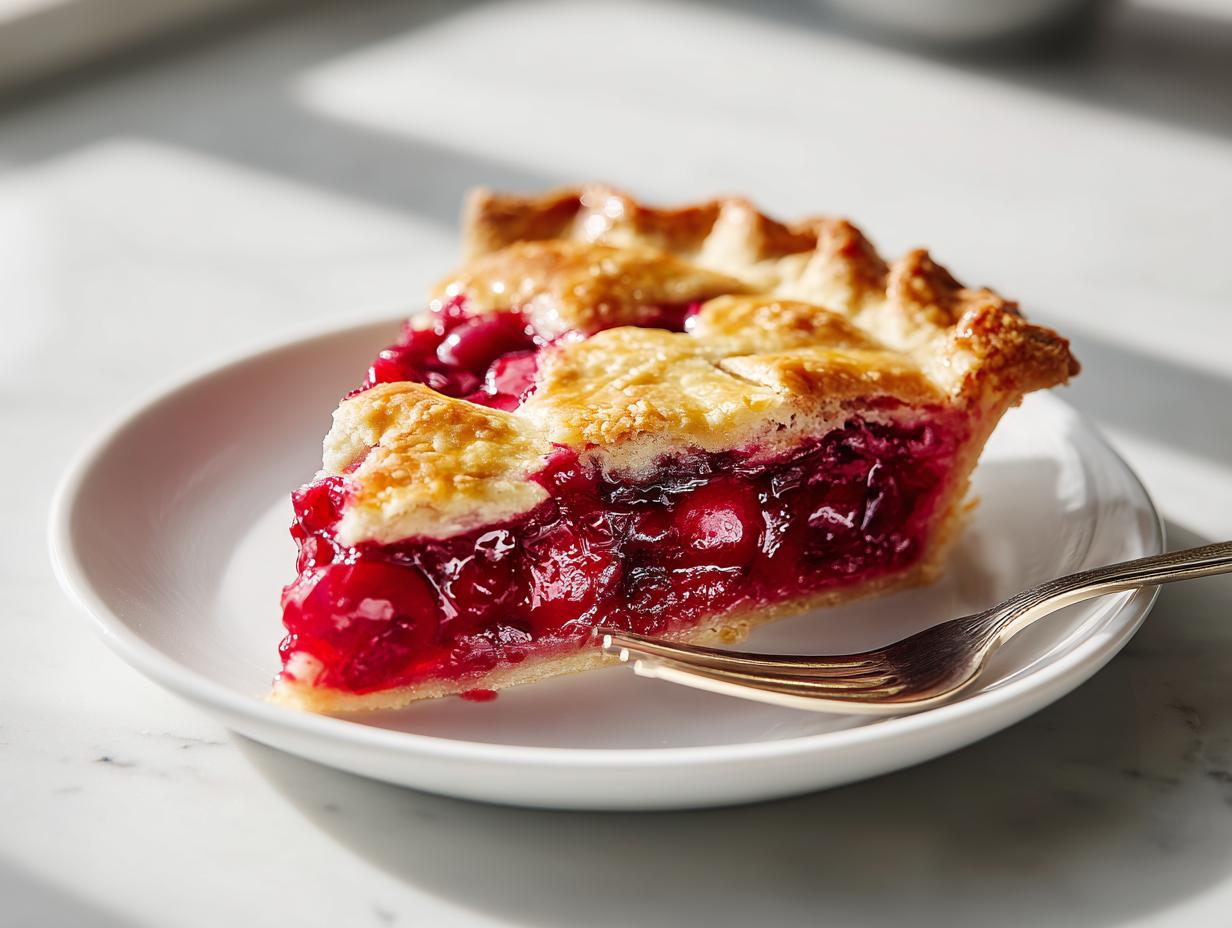
When the weather turns warm, my kitchen just screams for something bright, fruity, and just a little bit tart! Forget those heavy, overly sweet things; we need that sunshine flavor. That’s exactly why my Cherry Lemon Zest Pie has become the mandatory dessert at every summer gathering we have. It’s the absolute perfect marriage of sweet, dark cherries balanced by that incredible, zesty punch of fresh lemon.
I actually developed this recipe after I visited a cherry orchard up near Traverse City, Michigan, last summer. I came home with buckets of fresh cherries, and I was determined to make something far better than the standard cherry pie recipe. The inspiration hit me while I was grating zest for some lemonade—that bright citrus absolutely needed to crash the sweet cherry party! After about three tries getting the ratios just right, this version cemented itself as my teenage daughter’s favorite, and she hasn’t called any other dessert the “best” since.
Why This Cherry Lemon Zest Pie is Your New Summer Favorite
Honestly, this pie just hits all the right notes for those long summer evenings. It’s not just another fruit dessert; it’s an experience! I always feel like I’m showing off just a little bit when I pull this out of the kitchen.
- The flavor balance is just insane—that tartness from the lemon cuts right through the sweetness of the cherries.
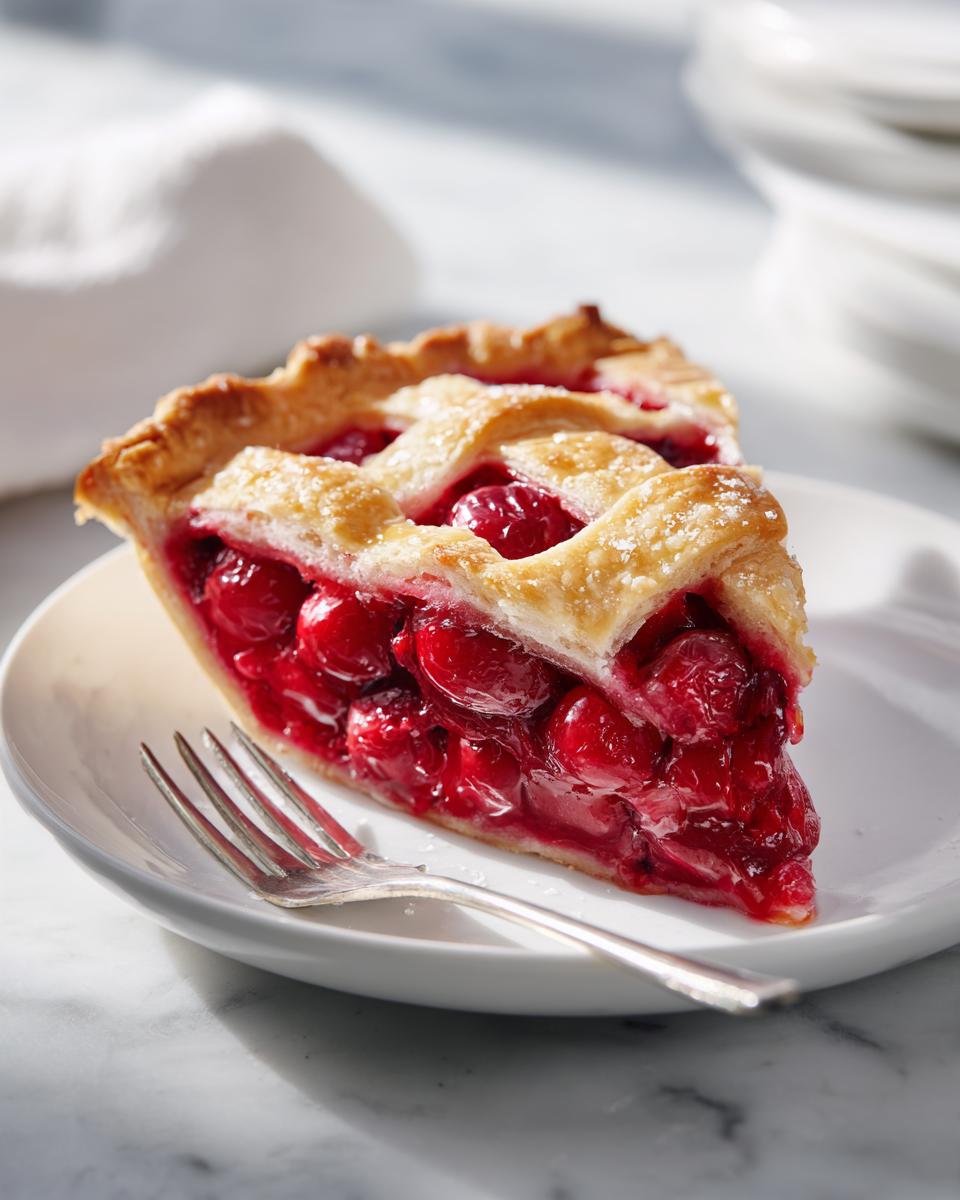
- It looks gorgeous! The filling is such a jewel tone, making it the ultimate showstopper for any patio party.
- Even if you’re reaching for a store-bought crust, this recipe feels totally homemade and special. Seriously, check out how easy some of our other best summer treats are too!
Essential Ingredients for the Perfect Cherry Lemon Zest Pie
Okay, listen up! You absolutely cannot switch out ingredients willy-nilly here. If you want that gorgeous, distinct flavor profile of the Cherry Lemon Zest Pie, you have to use what I call the dream team of components. The key, truly, is the zest—it needs to be *freshly* grated. None of that bottled stuff, ever!
I know sometimes we cheat on the crust, but for the filling itself, stick to the list. It’s designed to give you that thick, shiny filling that just screams “summer!”
For the Pie Filling
- 1 prepared 9-inch pie crust (go ahead, use store-bought if you’re short on time, I won’t tell!)
- 4 cups fresh or frozen pitted cherries
- 1 cup granulated sugar
- 3 tablespoons cornstarch (this is what keeps it from being soup!)
- 2 tablespoons freshly grated lemon zest (the star, remember?)
- 2 tablespoons fresh lemon juice
- 1/4 teaspoon almond extract
- 1/8 teaspoon salt (I prefer coarse salt here, but see the difference between salts here if you’re curious)
- 2 tablespoons unsalted butter, cut into small pieces
For the Topping and Finish
- 1 egg, beaten (this is just for the egg wash to make it shiny!)
- 1 tablespoon coarse sugar for sprinkling on top
Step-by-Step Instructions for Your Cherry Lemon Zest Pie
Alright, let’s get this amazing summer fruit pie assembled! Baking a perfect pie is all about following the timing, so pay attention here. Don’t rush the resting period for the filling—it’s vital if you want that gorgeous, thick result that doesn’t run everywhere.
Preparing the Crust and Filling
First up, you need to get that oven hot! Preheat it to 375°F (190°C). Take your 9-inch pie crust—whether you made it from scratch or sighed happily at the store-bought convenience—and press it nicely into your pan. Trim those edges and make them look pretty with a careful crimp. Don’t skip making the edges look nice; it matters!
Now for the magic: grab your large bowl. Toss in those pitted cherries, the sugar, the cornstarch, that glorious lemon zest, the juice, almond extract, and salt. Mix it all gently until everything looks coated. Here’s the trick: let that bowl sit on the counter for about 10 minutes. This lets the juices start releasing, and the cornstarch gets a head start soaking up the liquid. After that short wait, pour that beautiful mixture into your prepared crust. Dot the very top with those little pieces of butter we prepped; it adds richness right where it sits.
Baking the Cherry Lemon Zest Pie
You absolutely must place the pie pan onto a baking sheet before it goes in. Trust me on this, even the best pie filling decides to bubble over sometimes, and you’ll thank yourself later for saving your oven floor. If you’re doing a top crust—lattice or full—now’s the time to brush the edges with that beaten egg wash and sprinkle on the coarse sugar for sparkle.
Bake for about 45 to 55 minutes total. You’re looking for two things: a crust color that’s deep golden brown, and you need to see the filling bubbling really hard in the center. If you notice those beautiful crust edges getting too dark before the 15-minute mark, grab some aluminum foil or a dedicated pie shield and cover just the rim. Keeping an eye on it ensures you get a perfectly golden edge!
Once it’s out, don’t even think about cutting it! You need to let it cool completely on a wire rack. This cooling time, about three to four hours, is key—it lets the filling set up totally. For more pie-making secrets, you might want to check out these tricks for perfect pastry, even though this is a fruit pie! Grab some inspiration for classic pie building at Joy of Baking’s cherry pie page while you wait.
Tips for Making the Best Cherry Lemon Zest Pie
Making a show-stopper like this Cherry Lemon Zest Pie isn’t just about following steps; it’s about listening to your ingredients! I learned this the hard way during those initial test runs where my filling decided to ooze out like a bright red lava flow. Oops! Don’t let that happen to you! A great pie depends on a couple of key checks.
First, let’s talk about that sauce. The cornstarch is really important for thickening, but if you’re using really juicy cherries, you might need just a tiny bit more insurance against a runny slice. If your filling looks significantly thinner after that 10-minute rest period than mine usually does, just whisk in an extra half a teaspoon of cornstarch directly into the fruit mixture. It blends right in and saves you from a sloppy slice!
For the crust texture, especially if you’re using a bottom crust only, always make sure your pie pan is placed midway up the oven rack. I found that baking the bottom half lower for the first 20 minutes really helps set that base before the filling gets too hot. If you’re interested in learning more about building those amazing crusts, check out my guide on making perfect pie crusts!
My biggest breakthrough when I was perfecting this lemon zest dessert was realizing that the butter dots matter. Those little chunks melt into the filling during baking, creating pockets of richness that prevent graininess and add a lovely mouthfeel. Don’t skip them!
If you want to see how a true expert handles a classic pie (even if it’s not lemon-cherry!), Once Upon a Chef has some fantastic no-fail tips for beautiful results every time.
Equipment Needed for Your Cherry Lemon Zest Pie
You don’t need a whole arsenal of fancy gadgets for this cherry pie recipe, which is one of the things I love about it! But you do need a few basics to make sure everything fits and bakes evenly. Don’t worry if you only have a standard oven; these tools work perfectly together.
I always make sure these items are clean and ready before I even start grating the zest. It keeps the process flowing smoothly, and trust me, once that filling is ready, you want to move fast!
- One 9-inch pie pan – This standard size is what all my measurements are based on!
- A large mixing bowl – You need space to toss those cherries without splashing the ingredients everywhere, trust me, things get messy fast!
- A sturdy baking sheet – This holds the pie while baking and catches any drips, preventing an oven disaster.
- A wire rack – Essential for allowing the entire pie to cool down evenly after it comes out of the oven.
Ingredient Notes and Substitutions for Cherry Lemon Zest Pie
Since you’re already getting into making this incredible cherry lemon dessert, I know you might be wondering about ingredient swaps. That’s smart cooking! Knowing what you can switch out, and what you absolutely shouldn’t touch, is how you become a really confident baker. I’ve had readers ask me about freezing the cherries, and whether that almond extract is truly necessary for this lemon zest dessert.
Let’s tackle the most common questions I get right here. If you can plan ahead, fresh is always the goal for that plump texture, but I know life gets busy!
Using Frozen Cherries in Your Pie
You ask if you can use frozen cherries? Yes, you totally can! If you’re grabbing those beautiful dark red gems from the freezer section for your homemade cherry pie, just skip the 10-minute resting period mentioned in step three. Frozen cherries hold onto their liquid a bit differently.
The key thing here is NOT to thaw them first! Toss them straight from the freezer into the sugar and cornstarch mix. You might think you need extra cornstarch, but honestly, the recipe usually handles it fine because the moisture difference is minimal once they start heating up in the oven. If you’re worried about the liquid amount, just make sure the cornstarch seems to coat everything well, and you should be good to go. If you want to learn more about how fruit behaves during baking, I wrote a whole piece about whether to cook apples before putting them in a pie, which has useful concepts for any fruit pie!
The Role of Almond Extract (Don’t Skip This!)
This is one of my secrets for making it taste better than any standard cherry pie recipe! That tiny 1/4 teaspoon of almond extract might seem odd in a lemon pie, but trust me, it is crucial. Almond and cherry are flavor soulmates—the almond deepens the cherry flavor, making it taste richer and more authentic, almost like it was baked in an old-fashioned brick oven.
If you have a serious allergy, you can omit it entirely, but know that the filling will taste flatter. If you don’t have an allergy, try to keep it in there! It’s what gives this Cherry Lemon Zest Pie that extra layer of complexity that people rave about but can never quite place.
Why We Need the Butter Dots
When you dot the top of the cherries with those 2 tablespoons of cold butter bits, you aren’t just adding fat—you are adding insulation! This helps those delicious juices thicken up around pockets of richness instead of just boiling wildly. It guarantees a better texture across the board. It’s a simple old-school trick that makes a huge difference in any summer fruit pie.
Serving Suggestions for This Summer Fruit Pie
This Cherry Lemon Zest Pie is perfect all by itself, but if you want to really knock the socks off your guests, you need the right toppings. Since it’s such a perfect summer fruit pie, keeping things cool and creamy is the way to go!
I am a purist, so a scoop of good quality vanilla bean ice cream melting slowly down the side is heavenly. If you want something a little lighter, some freshly whipped cream spiked with a tiny vanilla bean scrap is fantastic. Oh! And homemade whipped cream is so easy, you should look at how easy it is to make perfect cream puffs just to learn how to whip cream better!
Storing Leftovers of Your Cherry Lemon Zest Pie
The toughest part about making this incredible Cherry Lemon Zest Pie is walking away from it after it comes out of the oven! But trust me, resisting the urge to slice it right away is the single most important step for storage. If you try to put a warm pie in the fridge, you end up with a steamy, soggy bottom crust, and nobody wants that drama.
That 3 to 4 hours of cooling on the wire rack isn’t just a suggestion; it’s structural engineering for your dessert! Once it is completely cool—make sure it’s room temperature, just like when you’d leave it out on the counter—then you can decide where it needs to go.
Keeping It on the Counter
In my house, if we plan to devour the whole thing within 24 hours, I just cover it loosely with foil or a cake dome and leave it right on the counter. The sugar content acts as a nice natural preservative, and the crust stays a little crisper this way. It’s perfect for that casual, grab-a-slice-anytime vibe.
However, if you used a store-bought crust that was particularly flaky or if your kitchen is super humid, you might want to opt for the fridge early on. If you’re interested in making sure your baked goods stay fresh longer in general, check out these handy tips on preventing baked goods from drying out!
Refrigerating for Longer Life
If you need your cherry lemon dessert to last longer than a day, you absolutely must refrigerate it. Wrap the fully cooled pie tightly in plastic wrap, or put it into an airtight container. It tends to last beautifully for about three to four days in the fridge. You can keep it in the fridge longer if you need to, but honestly, no cherry pie recipe lasts that long in my family!
When you pull it out of the cold, let it sit on the counter for about 30 minutes before serving to take the chill off; it brings back a lot of that fresh-baked flavor. If you notice the crust softened too much after refrigeration, you can gently warm individual slices in a low oven (around 300°F) for about 5 to 7 minutes. This little blast of heat helps crisp up the base! This method works great for almost any fruit pie, like this amazing cherry berry pie recipe I found awhile back.
Frequently Asked Questions About This Cherry Lemon Dessert
I always get a ton of questions once people see how gorgeous this Cherry Lemon Zest Pie is! It’s totally normal because we’re mixing sweet and tart, which can sometimes throw people off balance. But don’t worry, I’ve answered the most common queries about making this absolute showstopper.
Can I make the Cherry Lemon Zest Pie filling ahead of time?
Yes, you absolutely can! I often mix up the entire filling—cherries, sugar, the lemon zest, everything—and keep it covered tightly in the fridge for up to 24 hours before I plan to bake. This is great for busy days when you want to save time right before dinner.
When you use it, just give it a quick stir because things might settle in the fridge, but you don’t need a long rest time before pouring it into the crust, since the fruit is already releasing its lovely juices.
How do I prevent a soggy bottom crust when making this lemon zest dessert?
Ah, the arch-nemesis of every good pie maker! For this lemon zest dessert, the chilling and baking temperature are your best friends. Since the filling has a lot of liquid, you need to use the two-stage baking approach. Baking is an adventure, which is why I always bookmark fun articles on all kinds of desserts!
Here’s my trick: Place your pie pan on the lowest rack of the oven for the first 20 minutes. Baking the bottom closer to the heat source helps set that crust quickly before the juices fully saturate it. Then, move it to the middle rack for the remaining bake time to finish browning the top evenly. It really helps dry out that bottom crust!
Can I use dried cherries instead of fresh ones for this homemade cherry pie?
While I wholeheartedly recommend fresh or even frozen for the best texture in this homemade cherry pie, you can certainly use dried cherries if that’s what you have! You’ll need to adjust the liquid drastically, though.
If you substitute dried cherries, you must rehydrate them first. Soak about 2 cups of dried cherries in hot water (or even a splash of cherry juice) for about 30 minutes until they plump up. Drain them *very* well, and then you’ll want to reduce the fresh lemon juice in the recipe by about half, because the dried fruit absorbs liquid differently. You might even need to up the cornstarch by another half tablespoon just to be safe!
Cherry Lemon Zest Pie
Equipment
- 9-inch pie pan
- Large mixing bowl
- Baking Sheet
- Wire Rack
Ingredients
For the Pie
- 1 prepared 9-inch pie crust (homemade or store-bought)
- 4 cups fresh or frozen pitted cherries
- 1 cup granulated sugar
- 3 tablespoons cornstarch
- 2 tablespoons freshly grated lemon zest
- 2 tablespoons fresh lemon juice
- 1/4 teaspoon almond extract
- 1/8 teaspoon salt
- 2 tablespoons unsalted butter, cut into small pieces
For the Topping
- 1 egg, beaten (for egg wash)
- 1 tablespoon coarse sugar for topping
Instructions
- Preheat your oven to 375°F (190°C). Roll out your pie crust and fit it into a 9-inch pie pan, trimming any excess and crimping the edges decoratively.
- In a large mixing bowl, combine the cherries, granulated sugar, cornstarch, lemon zest, lemon juice, almond extract, and salt. Toss gently until the cherries are evenly coated.
- Let the cherry mixture sit for 10 minutes to allow the juices to release and the cornstarch to begin absorbing the liquid.
- Pour the cherry filling into the prepared pie crust, spreading it evenly. Dot the top of the filling with small pieces of butter.
- If you want a top crust, create a lattice top with additional pie dough or use cookie cutters to create decorative cutouts. Brush the crust edges with beaten egg and sprinkle with coarse sugar.
- Place the pie on a baking sheet to catch any drips. Bake for 45 to 55 minutes, or until the crust is golden brown and the filling is bubbling vigorously.
- If the crust edges brown too quickly, cover them with aluminum foil or a pie shield during the last 15 to 20 minutes of baking.
- Remove the pie from the oven and allow it to cool on a wire rack for at least 3 to 4 hours before slicing. This cooling time lets the filling set properly.
- Serve at room temperature or slightly warm, optionally topped with vanilla ice cream or freshly whipped cream.