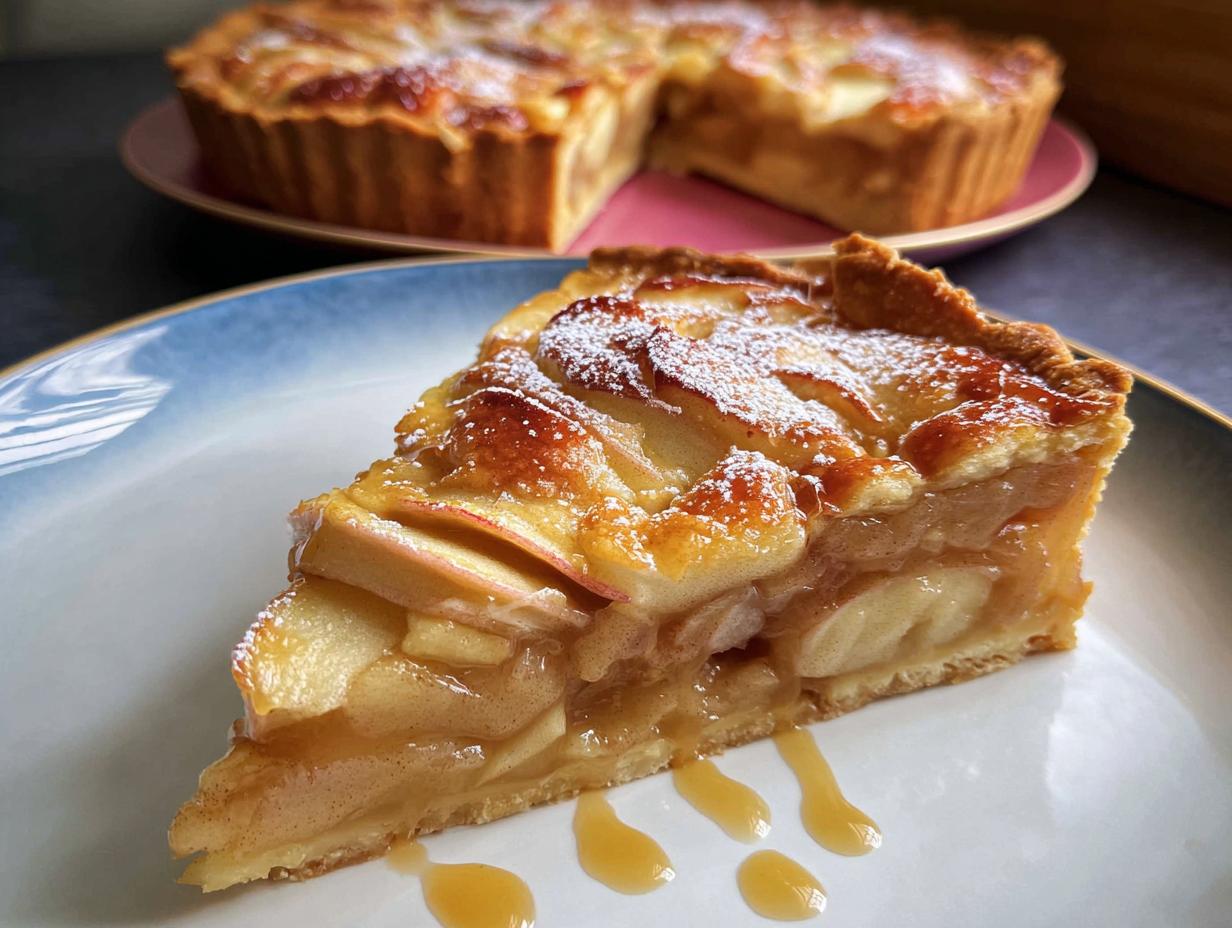
There’s nothing quite like the smell of caramel and apples bubbling away in the oven on a crisp fall afternoon. When I first tried my hand at making this Caramel Apple Tart with freshly picked orchard apples years ago, I knew I’d stumbled onto something special. That first golden-brown tart looked almost too pretty to eat—until I took one bite of the flaky crust, tender spiced apples, and rich caramel swirls. Now it’s become my go-to dessert whenever I want something that feels fancy but comes together without fuss.
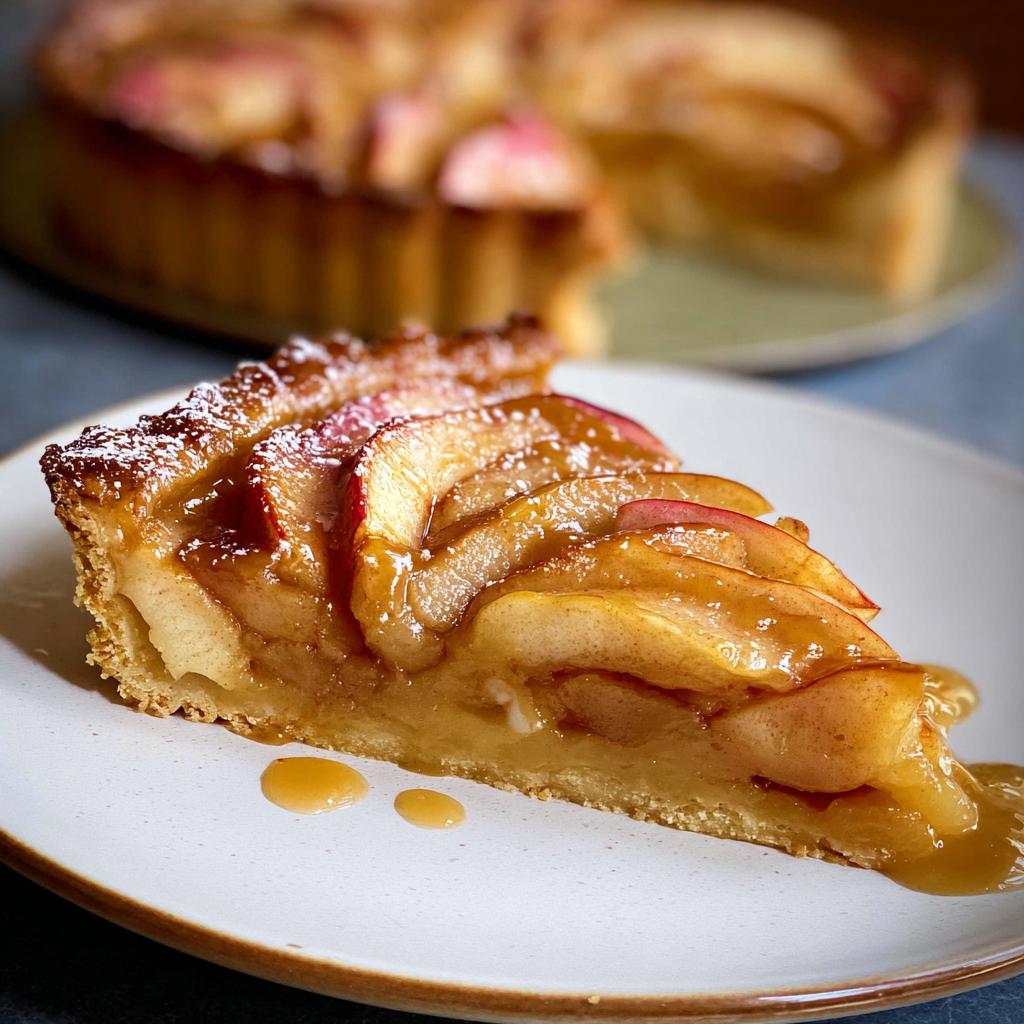
What makes this tart so magical is how simple ingredients transform into something truly spectacular. Sweet pastry crust hugs layers of thinly sliced apples bathed in brown sugar caramel that’s just the right balance of sticky and smooth. It smells like autumn and tastes like pure comfort. Sure, you could make a pie—but this tart’s elegant free-form beauty makes it perfect for Thanksgiving gatherings or cozy nights in with family.

Why You’ll Love This Caramel Apple Tart
Trust me, this isn’t just another apple dessert—it’s the one that’ll have everyone begging for seconds. Here’s why it’s special:
- That flaky pastry: Buttery, crisp, and sturdy enough to hold all those juicy apples without getting soggy—just like my grandma’s perfect pie crust, but easier.
- Tender, fragrant apples: Sliced just right so they soften but keep their shape, mingling with the caramel in every bite.
- Rich, glossy caramel: Not too sweet, not too heavy—just deep, buttery goodness that pools around the apples.
- Holiday magic: Fancy enough for Thanksgiving dinner, simple enough for a Sunday bake. (Bonus: no lattice-weaving stress!)
- Pie’s elegant cousin: All the flavors you love, with that rustic tart charm that says “I meant for it to look this artfully imperfect.”
Pro tip: The smell alone will make your kitchen feel like fall.
Ingredients for Caramel Apple Tart
Gathering your ingredients is like assembling the cast for autumn’s tastiest show—everyone has an important role! I’ve learned through trial and error that quality matters here. Splurge on real butter (none of that margarine nonsense) and the freshest apples you can find. Trust me, your taste buds will thank you.
Pastry Base
The foundation of our masterpiece:
- 400g sweet short pastry: You can make your own (try this recipe)—I won’t judge if you cheat with store-bought though!
Filling
Where the magic happens:
- 3-4 small apples: Thinly sliced—I prefer Granny Smith for their tartness
- 100g butter: The good stuff, softened
- 200g brown sugar: Packed tight—this creates that caramel depth
- 1 tsp vanilla essence: Real vanilla makes all the difference
- 2 Tbsp golden syrup: The secret weapon for glossy caramel
- 2 eggs: Room temperature blends smoother
- ½ cup flour: Regular all-purpose works great
- 125ml milk: Room temperature—cold will make the butter seize up
To Serve
The glorious finale:
- Ice cream or yogurt: Vanilla bean is my personal weakness
See? Simple ingredients you probably already have—well, except maybe that golden syrup, but trust me, it’s worth tracking down!
Equipment Needed for Caramel Apple Tart
You don’t need fancy gadgets for this tart—just a few trusty baking essentials you likely have already. Here’s what I always grab from my kitchen:
- 25cm round tart tin: My well-loved fluted one gets the edges beautifully crisp
- Baking paper: Lifesaver for easy removal (crumple it first for better fitting!)
- Mixer: Hand or stand—though I’ve made this with a good old wooden spoon when desperate
That’s it! Well, plus a rolling pin and a fork for pricking the pastry—but those hardly count as special equipment. See? Simplicity at its finest.
How to Make Caramel Apple Tart
Okay, let’s get baking! I know staring down that perfect tart in the recipe photo can feel intimidating, but I promise—it’s way easier than it looks. Follow these steps, and you’ll have a showstopper that tastes just like those cozy fall days we all love.
Preparing the Pastry Base
This is where your tart gets its sturdy foundation. First, preheat your oven to 180°C fan bake—I like to do this now so it’s perfect by the time my pastry’s ready. Roll out your pastry on a sheet of baking paper (sprinkle a tiny bit of flour to prevent sticking).
Here’s my secret: don’t roll too thin! About 5mm thickness gives you that perfect balance—sturdy but still flaky. Transfer the paper with the pastry into your tart tin, gently pressing it into the corners. Now grab a fork and prick the base all over—this stops it from puffing up too much. Chill it in the freezer for 15 minutes (yes, freezer! It makes the pastry extra crisp).
Pop it in the oven with baking weights for 10 minutes, then remove the weights and bake another 10 minutes until golden. That slight head start is what gives you that perfect crunch that won’t get soggy under all that caramel goodness.
Assembling the Caramel Apple Tart
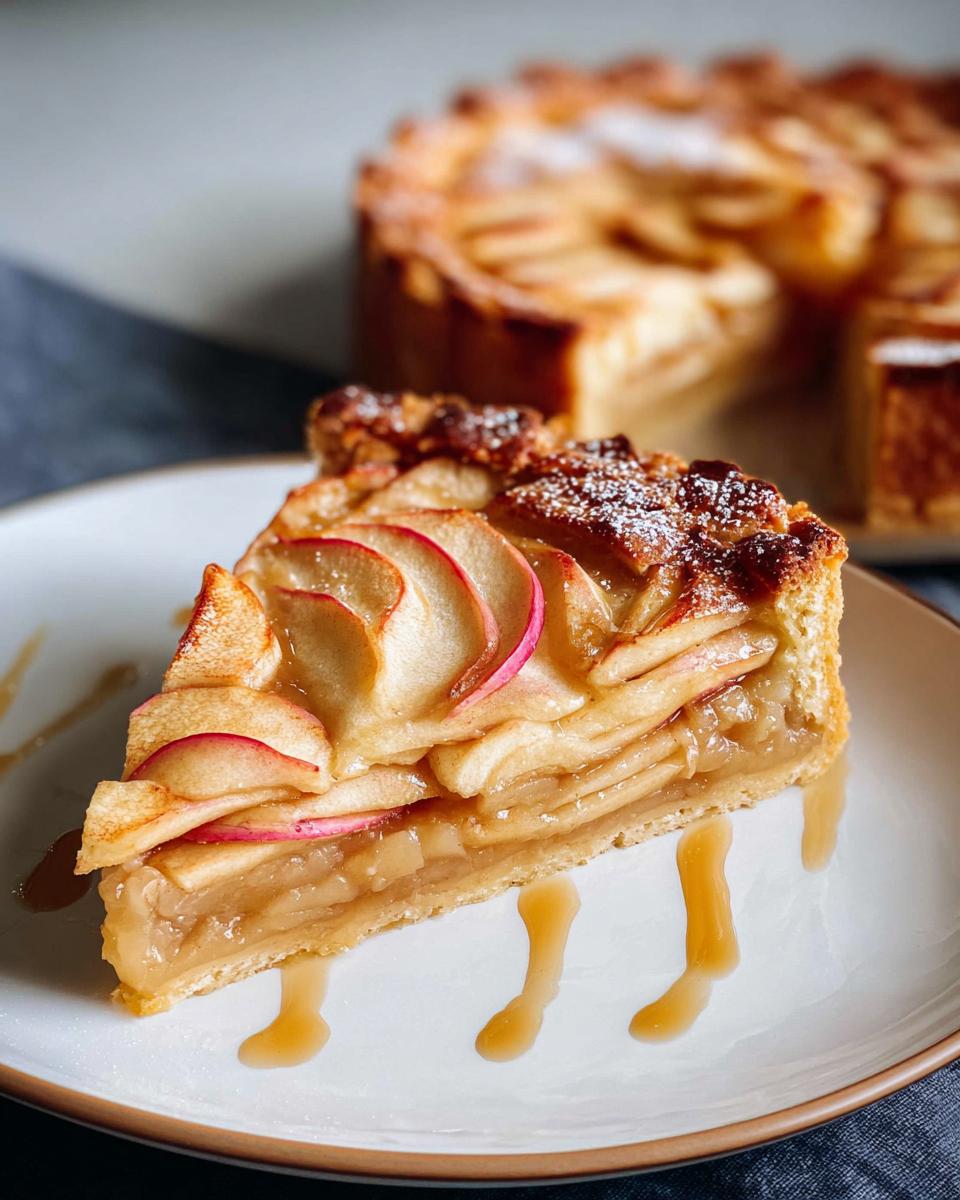
While your pastry cools slightly, let’s prep those apples. Thin slices are key here—about 5mm thick—so they soften just right. I like to fan them out in concentric circles because it looks stunning, but honestly, just tumbling them in works too!
Now the fun part: the caramel magic. Cream together your butter and brown sugar until it’s fluffy and pale—this takes about 2 minutes with a mixer. Add the vanilla and golden syrup (careful, it’s sticky!), then beat in the eggs one at a time. The trick is to go slow—you don’t want curdled caramel! Sift in the flour, add the milk, and mix just until combined. It’ll look like thick pancake batter—that’s your sign it’s perfect.
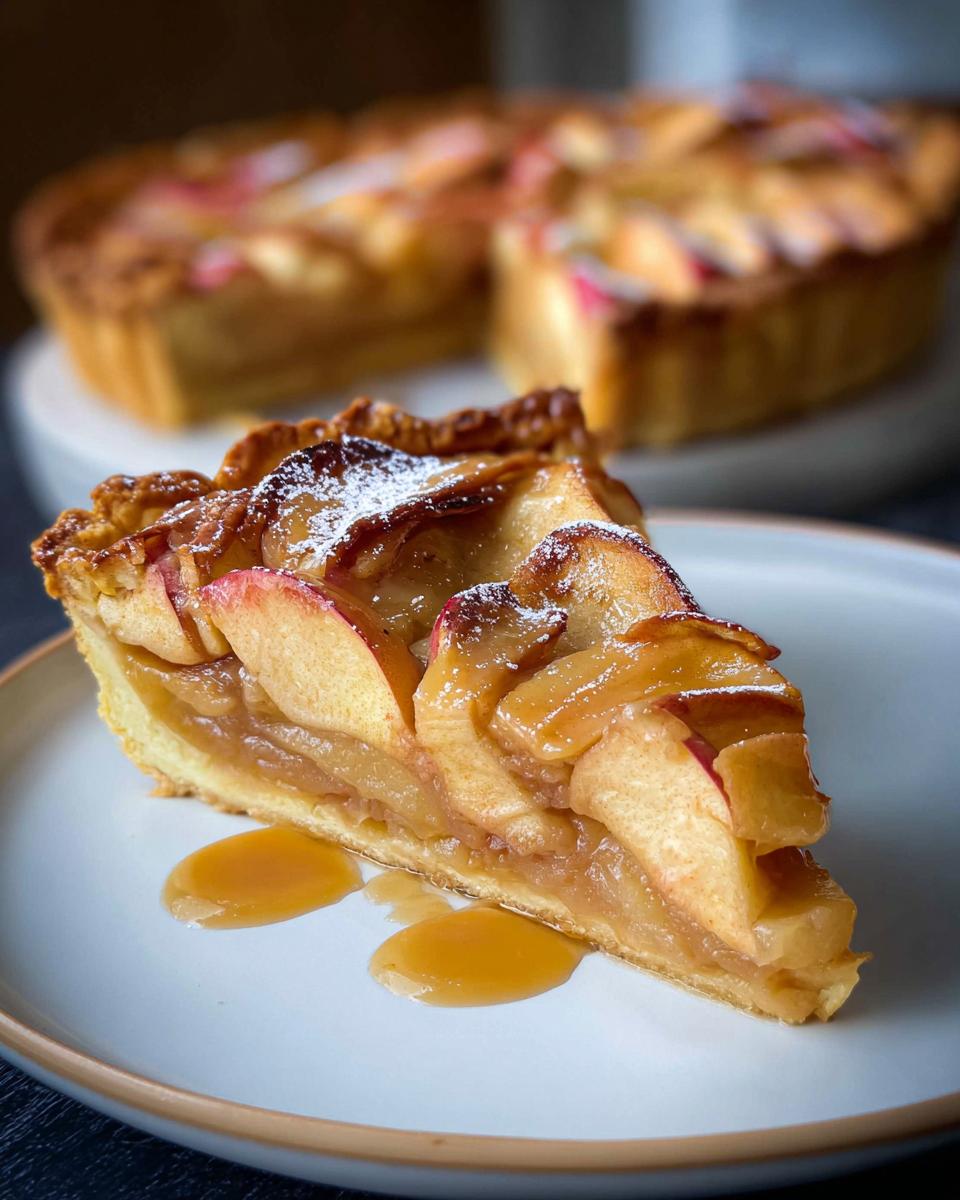
Pour this glorious mixture over your apple arrangement. Don’t worry if some apples peek out—that rustic look is part of the charm!
Baking and Cooling
Bake your tart at 180°C for 10 minutes—this initial burst of heat sets the crust. Then, and this is crucial, lower the temperature to 150°C for the remaining 50 minutes. The gentle heat cooks the filling without over-browning the edges.
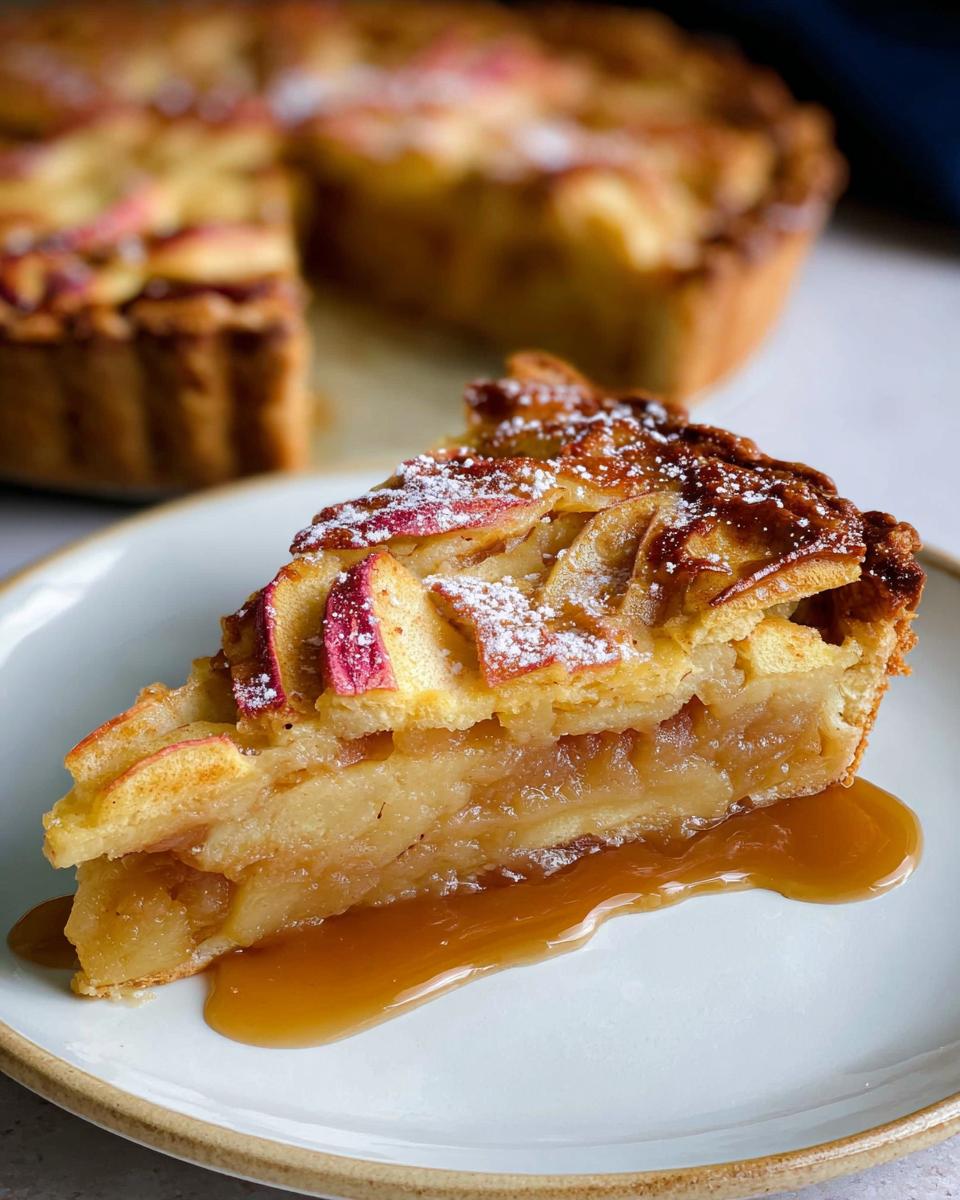
How do you know it’s done? The center should have just a slight wobble when you nudge the pan—like set custard. It’ll firm up as it cools. And oh, the waiting! Let it cool completely in the tin. I know it’s hard with that caramel scent filling your kitchen, but slicing it warm makes a mess. (Learned that the hard way!)
When it’s time, serve with a scoop of vanilla ice cream melting over those caramel rivers. Pure heaven! Pro tip from my scone-baking adventures: reheating slices for 10 minutes makes leftovers taste freshly baked.
Tips for the Perfect Caramel Apple Tart
After making this tart more times than I can count (and eating even more slices), I’ve picked up some foolproof tricks to guarantee success every time:
- Choose your apples wisely: Firm varieties like Granny Smith or Honeycrisp hold their shape beautifully—no mushy apples here! Slice them evenly so they cook at the same rate.
- Room temp is your friend: Cold eggs or milk can make your caramel filling separate. Take them out at least 30 minutes before baking—I set mine next to the oven while it preheats.
- Watch the wobble: Overbaking is the enemy of creamy caramel. Pull it when the center jiggles slightly like set custard—it’ll firm up as it cools.
- Serve it warm: That melty caramel over vanilla ice cream? Absolute perfection. Reheat slices for 10 minutes if serving leftovers.
Remember: a slightly imperfect tart is still delicious—those caramel drips down the sides are what make it homemade!
Common Questions About Caramel Apple Tart
I’ve gotten so many questions about this tart over the years—here are the ones that pop up most often (and believe me, I’ve made every mistake so you don’t have to!):
Can I use store-bought pastry?
Absolutely! While I love homemade, there’s no shame in using good quality store-bought pastry—especially when you’re short on time. Just make sure it’s the sweet shortcrust kind. I keep a roll in my freezer for last-minute Thanksgiving desserts!
Should I cook the apples first?
Nope! That’s the beauty of this tart—the apples cook to perfection in the oven. Slicing them thin (about 5mm) is key. I used to worry they wouldn’t soften enough, but as my post about apple prep techniques explains, the caramel works its magic while baking.
How should I store leftovers?
If you have any left (big if!), cover it loosely and keep it at room temp for up to 2 days. The crust stays crisp, though the caramel gets gloriously gooey by day two—my husband actually prefers it this way! For longer storage, refrigerate for up to 5 days and reheat slices before serving.
Can I make this ahead for Thanksgiving?
You read my mind! Bake it the day before—just hold off on slicing. Warm the whole tart at 150°C for 15 minutes before serving. The crust stays crisp, and the caramel reheats beautifully. I’ve done this for years when hosting, and guests never guess it’s not fresh from the oven.
What’s the best apple variety to use?
I swear by Granny Smith for their tartness that balances the sweet caramel, but any firm baking apple works. Honeycrisp, Braeburn, or Pink Lady all hold their shape. Avoid super soft varieties—they’ll turn to mush. Mix types for fun flavor combos!
Nutritional Information
Now, I know what you’re thinking—should we really be counting anything when something smells this good? While I don’t have exact numbers (because honestly, I’m too busy enjoying the tart!), keep in mind that nutritional values will vary based on your apple varieties, butter quality, and that extra scoop of vanilla ice cream you just had to add. This is a special occasion dessert, after all—let’s save the math for another day!
More Fall Desserts to Try
Once you’ve mastered this Caramel Apple Tart (and trust me, you will!), why stop there? Fall baking is my absolute favorite season for desserts. If you loved this tart, you’ll go crazy for my super moist pumpkin bread—it’s like autumn in loaf form! And those cranberry orange muffins? Perfect with your morning coffee when you want something sweet but not too heavy. Honestly, I could spend all October rotating through these recipes—and usually do!
Caramel Apple Tart
Equipment
- 25cm round tart tin
- Baking paper
- Mixer
Ingredients
Pastry Base
- 400 g sweet short pastry
Filling
- 3-4 small apples thinly sliced
- 100 g butter
- 200 g brown sugar
- 1 tsp vanilla essence
- 2 Tbsp golden syrup
- 2 eggs
- 0.5 cup flour
- 125 ml milk room temperature
To Serve
- ice cream or yoghurt
Instructions
- Preheat the oven to 180°C fan bake. Line a 25cm round tart tin with baking paper.
- Roll the pastry out on top of the baking paper. Press into the base and prick with a fork. Chill in the freezer for 15 minutes.
- Blind bake the tart for 20 minutes, removing the weights after 10 minutes so the base can brown. Remove and cool.
- Thinly slice the apples and arrange in the pastry case.
- In a mixer, cream the butter and brown sugar until pale. Mix in the vanilla, golden syrup, then the eggs one at a time. Sift in the flour, add the milk, then mix to combine.
- Pour the filling over the apples. Bake for 10 minutes, then lower the temperature to 150°C and bake for another 50 minutes until the middle has only a slight wobble.
- Remove from the oven and let it cool in the tin. Serve warm with ice cream or yoghurt.