If you’re hosting a party and you look at the clock and realize you completely forgot about dessert—don’t panic! I know that feeling well! That’s why I keep this Birthday Dirt Cake recipe locked and loaded in my back pocket. It’s the easiest, most ridiculously fun homemade dessert you will ever throw together. Seriously, we’re talking minimal ingredients, zero baking skill required for the assembly, and maximum kid appeal.
This recipe uses store-bought shortcuts beautifully, layering them up to look like something elaborate. I tested this setup last week when my nephew sprung a surprise visit on me, and honestly, it held up beautifully. It’s the ultimate make-ahead treat that guarantees smiles!
Why This Birthday Dirt Cake is Your New Go-To for Simple Desserts
When I’m short on time or just feeling lazy—hey, we all have those days!—I turn straight to this recipe. The Birthday Dirt Cake shines because it doesn’t ask much of you. You bake a box mix, whip up some instant pudding, and call it a day. It’s fantastic for busy weekdays or when you need a dessert fast for a spontaneous celebration.
It’s assembled in layers, which makes it look way fancier than it actually is. You don’t even need electric mixers for the assembly phase. Honestly, if you can crumble a cookie and fold two things together, you can nail this dessert every single time. It’s one of those trusty no-bake style recipes that just never lets me down.
Perfect for Easy Treats and Large Gatherings
This recipe is built for volume! It’s perfect when you need an Easy Dessert For A Crowd without breaking the bank or spending all day in the kitchen. Because it’s so modular, it counts as one of those truly Easy Desserts With Few Ingredients. We’re talking about four main components before we even get to the fun decorations! It simply streamlines the whole party planning process.
Assembling Your Birthday Dirt Cake: Ingredients List
Okay, deep breath! Gathering your supplies for the Birthday Dirt Cake is half the victory. Since we are leaning into simplicity here, I always buy the boxed cake mix and instant pudding right off the shelf. No fuss! Everything you need for this amazing, layered homemade dessert is listed below. Remember, prep work is key, so make sure your cake is cooled before you dive in!
For the Cake and Pudding Layers
These are the creamy, structural elements that hold our dessert together. You’ll bake the cake first, obviously, but the pudding needs cold milk to set up correctly. The whipped topping needs to be thawed if you keep it in the freezer, otherwise just grab the tub from the fridge!
- 1 box Chocolate cake mix (This needs to be baked and cooled completely, seriously!)
- 2 boxes Chocolate pudding mix (Make sure this is the instant type; it sets way faster!)
- 1 L Cold milk (For making that pudding sing!)
- 300 ml Whipped topping (Thawed, please!)
For the Dirt Topping and Decoration
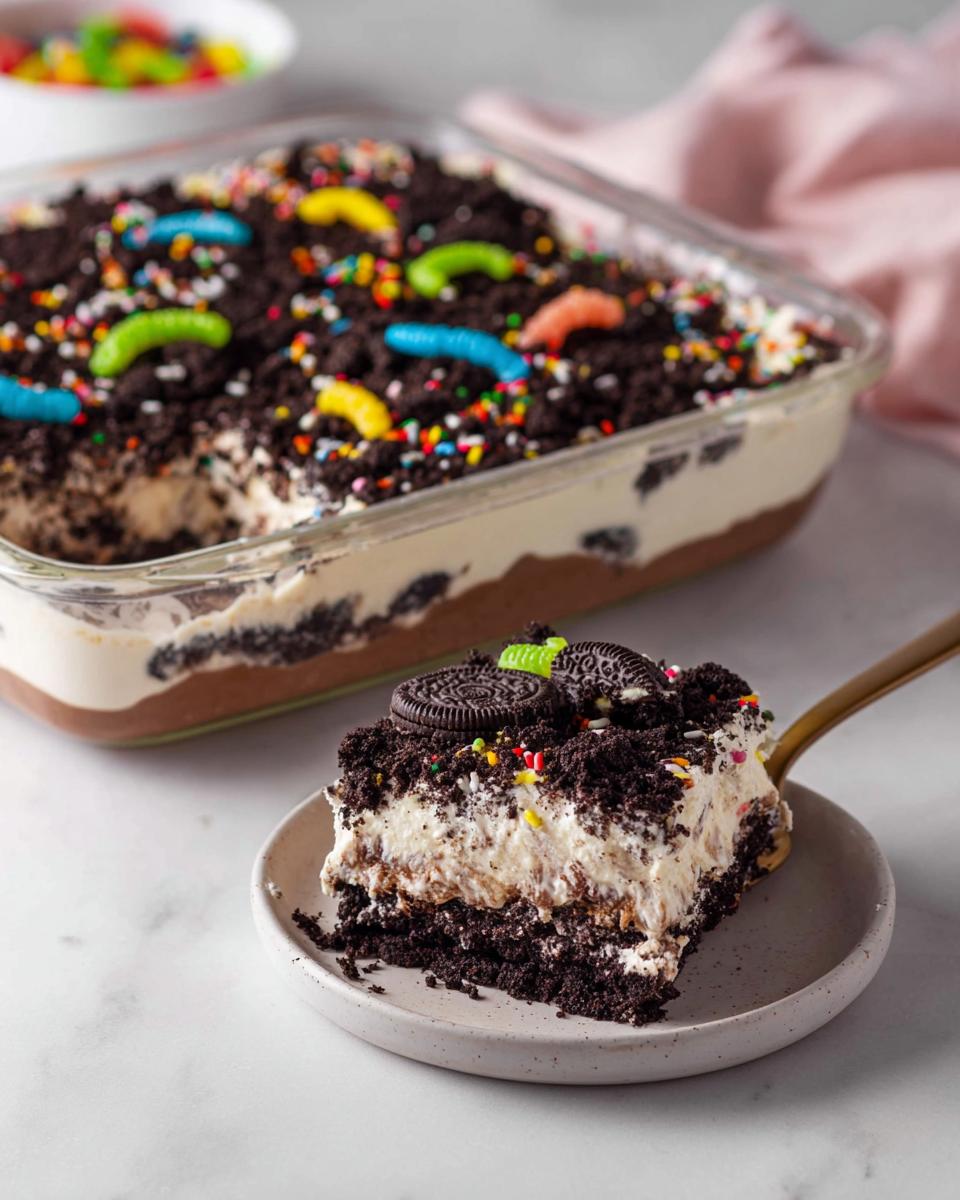
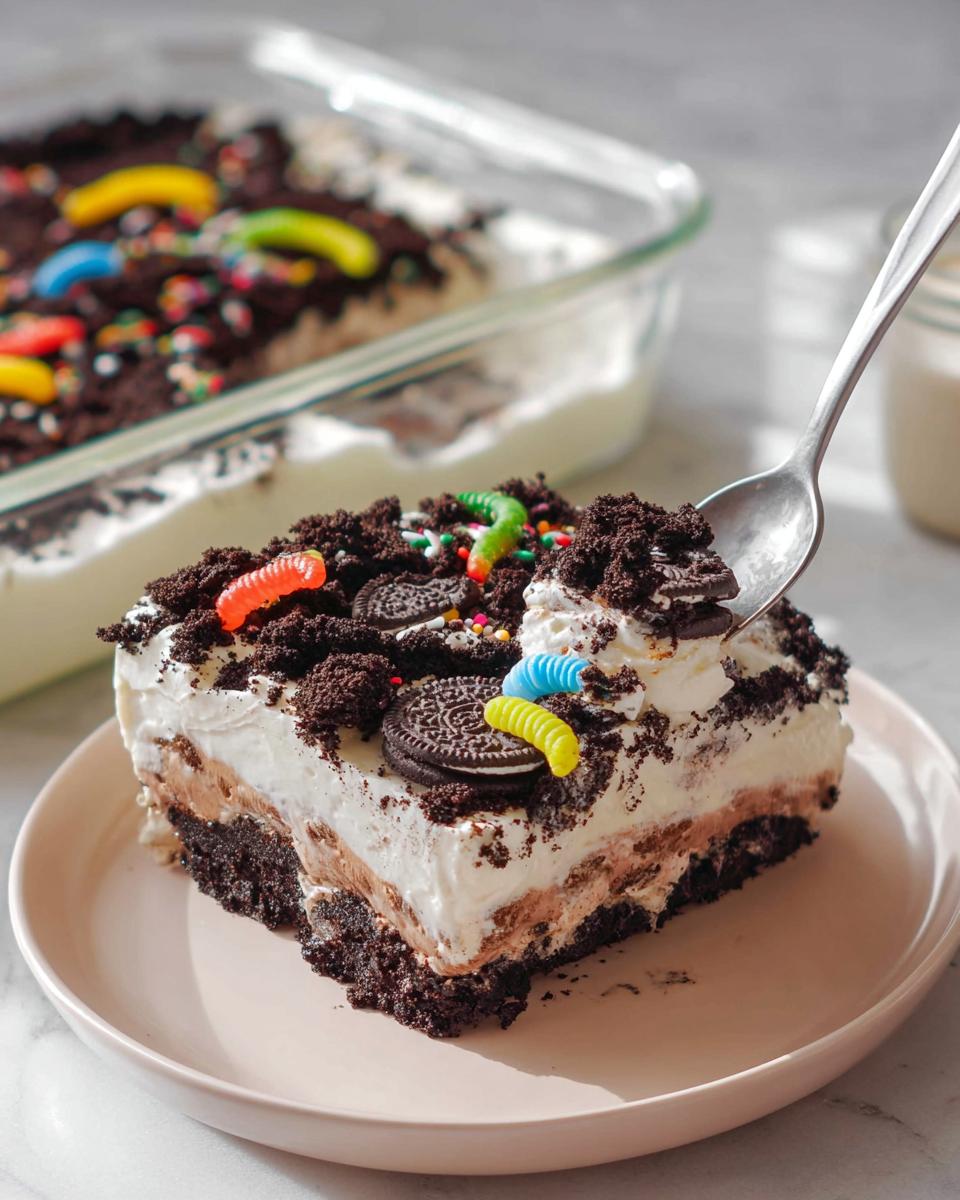
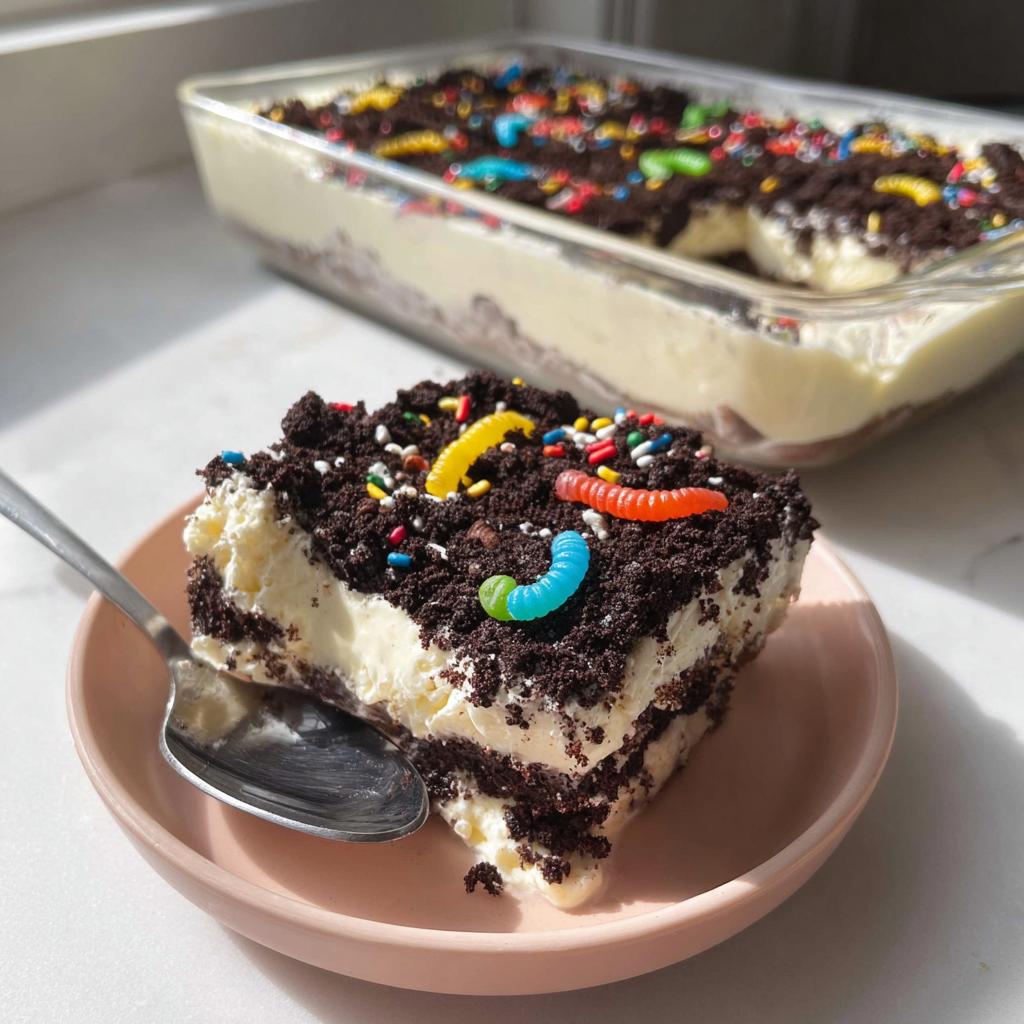
This is where the fun starts! You need those Oreos nice and crumbly—we are going for fine dirt, not chunky gravel, right? The sprinkles and worms are non-negotiable for a true birthday vibe, they just make the whole thing feel special, even though it’s so easy.
- 250 g Oreo cookies (These must be crushed finely!)
- 1 jar Sprinkles (Whatever colors make you happy!)
- 1 bag Gummy worms (The stars of the show!)
Step-by-Step Instructions for the Birthday Dirt Cake
This is the fun part, but you absolutely must be patient about cooling times, or you end up with sweet brown soup! Remember, we are building structure here. I always plan to bake my cake layers the morning before I plan to assemble this Birthday Dirt Cake so they are fully cooled when I get to this stage. Follow these steps closely, and you’ll have the perfect treat ready for the fridge! If you love this layered idea, you might want to check out my recipe for pumpkin patch dirt cups sometime!
Preparing the Cake and Pudding Base
First thing’s first: bake that chocolate cake mix according to the box instructions. Once it’s done, set it aside—it needs to cool completely before we move on; a warm cake just melts the pudding, trust me on this one! While that’s chilling out, take your instant pudding mix and whisk it up really well with the cold milk until it starts getting nice and thick, just like the directions say. While this recipe is classic, you can find similar fun dirt cake recipes out there too!
Layering the Birthday Dirt Cake
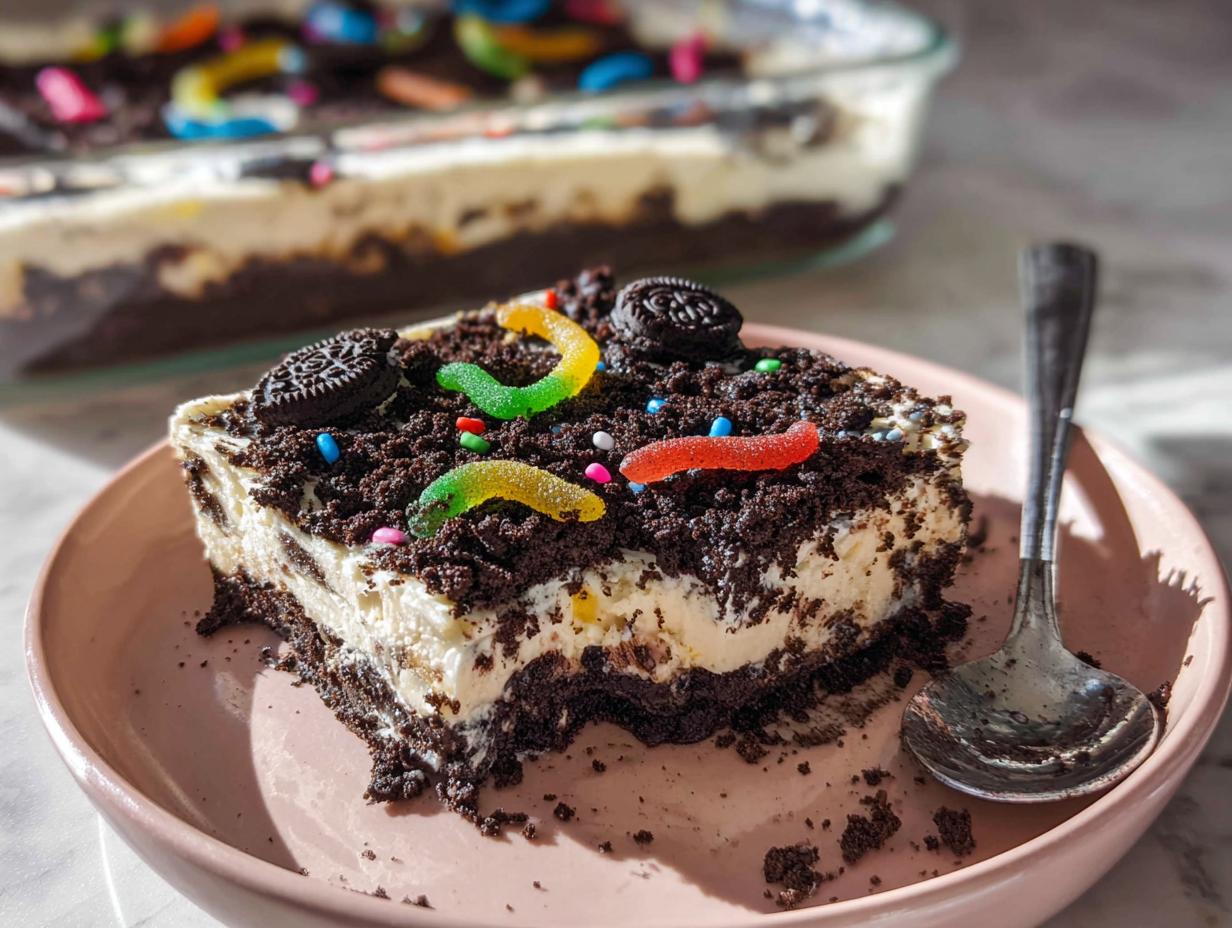
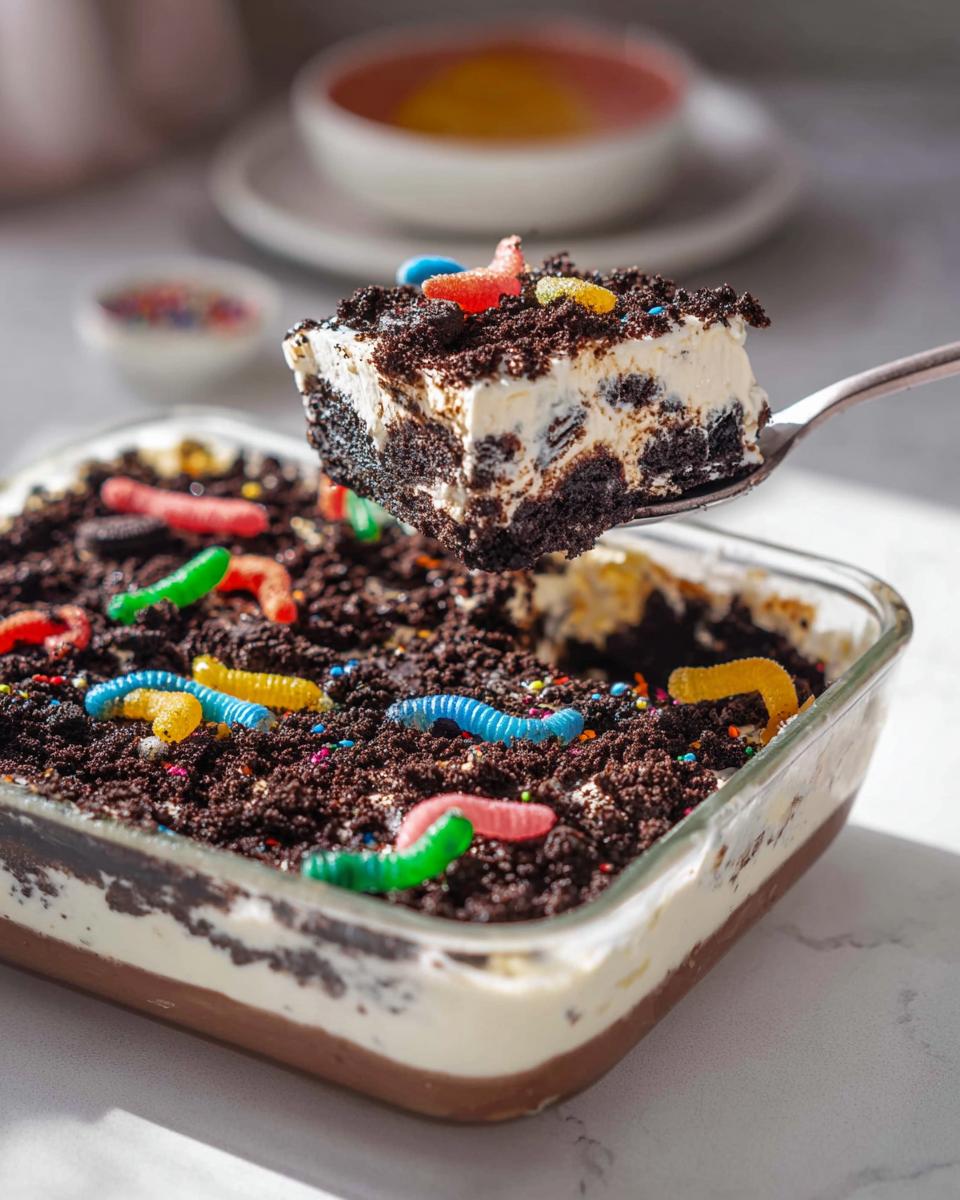
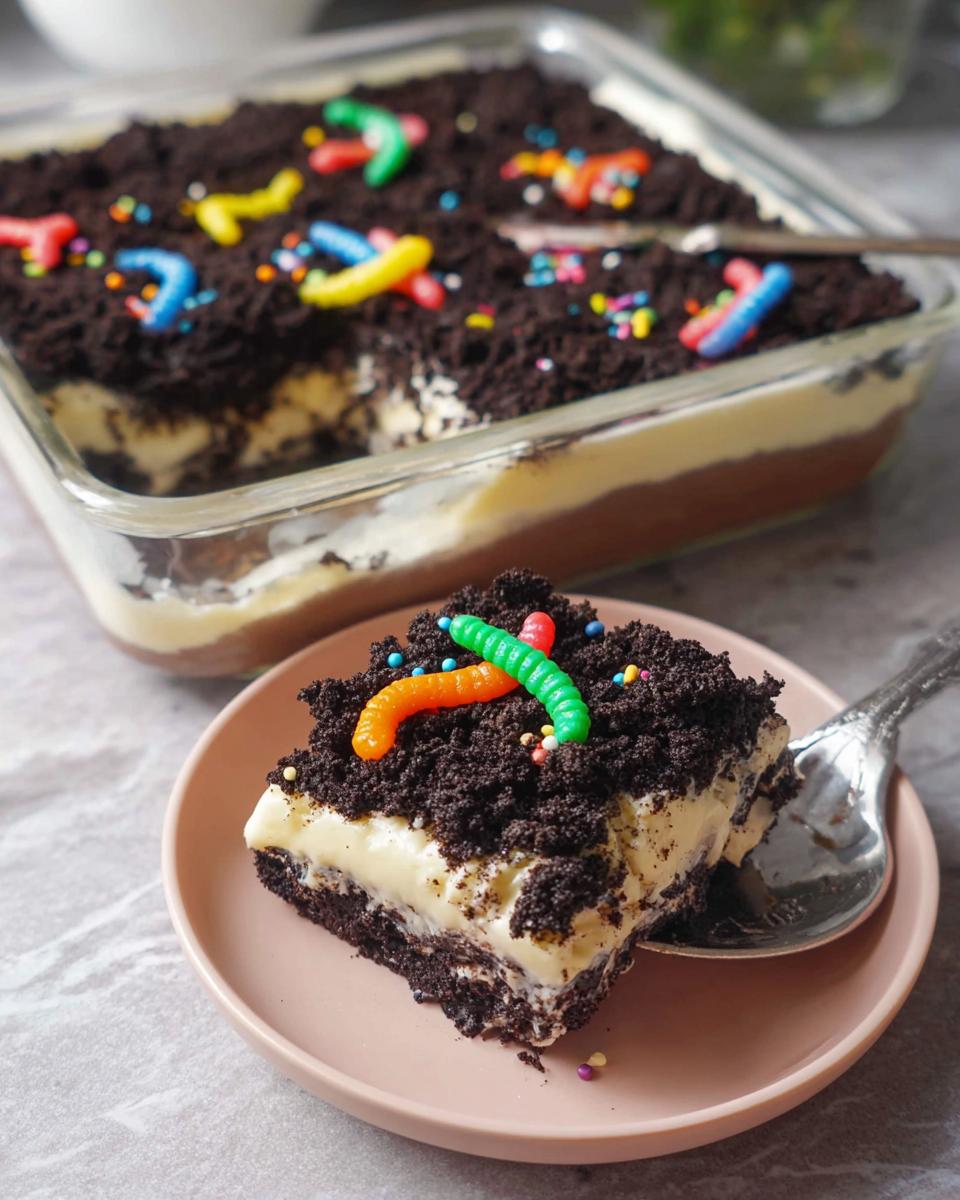
Once the cake is totally cool, crumble it right into your 9×13 pan or large serving dish. This is the base of our garden! Now, take that fluffy whipped topping and gently fold it into your thickened pudding mixture—we want it light and airy, so don’t mash it! Next, dollop half of that creamy concoction over the cake crumbs and spread it nicely. Sprinkle half of your crushed Oreos on top of that pudding layer. Repeat the layering sequence: remaining pudding, followed by the remaining cookie crumbs. That’s the core of your Birthday Dirt Cake done!
Tips for Success with Your Homemade Desserts
Even though this is a super easy dessert, there are a couple of little tricks I’ve learned over the years to make sure it sets up beautifully and tastes amazing. If you skip these steps, you might end up with mush instead of layers! Remember, preparation is everything when you are assembling something like this that doesn’t go into the oven at the end, like a cookie crumble topping.
The biggest thing that trips people up is rushing the cooling time for the cake. Don’t even think about touching the pudding layer until that cake feels cool enough to hold comfortably in your hands. Once you’ve assembled everything, you have to let it chill. Seriously, no cheating the clock!
Achieving the Perfect Texture in Your Birthday Dirt Cake
For the crushed Oreos, I usually just pop them into a sturdy zip-top freezer bag and whack them with a rolling pin until they look like coarse sand. It’s great stress relief, too! The most critical part of the process for the Birthday Dirt Cake is the chilling time. You need at least three to four hours in the fridge. That time lets the pudding firm up and lets the moisture from the pudding soak just slightly into the cake layer, making it tender without being sloppy.
Easy Dessert Ideas: Variations on the Birthday Dirt Cake
You know how much I love keeping things simple, but that doesn’t mean we can’t get creative! The best part about the Birthday Dirt Cake is that it acts like a blank canvas for whatever flavor mood you’re in. Since it layers so easily, you can swap out components for different holidays or to match the birthday person’s favorite things. It’s super flexible, which is exactly what we busy cooks need!
Don’t feel locked into chocolate 100% of the time, either! This assembly process works perfectly with other flavors. When you’re thinking up your next batch of homemade desserts, just keep the layering structure the same. It’s foolproof!
Swapping Cake and Pudding Flavors
If you want to move away from the intense chocolate, try using a vanilla or yellow cake mix instead. For the pudding, instant cheesecake flavor is surprisingly incredible with the crushed Oreos—it adds this creamy tang! Or, you can stick to chocolate cake but use white chocolate pudding for a lighter look for the Birthday Dirt Cake.
Storage and Serving Suggestions for this Easy Treat
Since this is a chilled dessert, we need to chat about keeping it happy in the fridge! When you finish decorating your Birthday Dirt Cake, cover that whole pan tightly with plastic wrap. You need that chill time—remember, minimum of three to four hours for the layers to really set up nice and firm. If you cover it well, this treat keeps beautifully in the refrigerator for a good two or maybe even three days. It tastes great the next day, in fact!
Now, here’s the thing: Don’t even think about trying to heat this up! It’s designed to be served cold, straight from the fridge. If you warm it, you’ll just melt the pudding and whipped topping into a soupy mess. Serve big, hefty scoops of this easy treat alongside a hot cup of coffee for the adults, or just a big glass of cold milk for the little ones. It’s perfect!
Frequently Asked Questions About Birthday Dirt Cake
I always get tons of questions when people see this recipe because it looks like it should be way more work than it actually is! Since this is one of my ultimate go-to Simple Desserts, let’s clear up any confusion so you can whip up the best Easy Treats without a second thought!
Can I make the Birthday Dirt Cake ahead of time?
Oh yes, absolutely! That’s one of the best things about the Birthday Dirt Cake. You can assemble the entire cake, minus the final, super detailed decorations, up to 24 hours in advance. Keep it covered tightly in the fridge. I usually wait until about an hour before the party starts to put on the gummy worms and final sprinkle shower, just because the worms can sometimes get a little sticky if they chill overnight.
What is the best way to crush Oreos for this recipe?
You really want that authentic ‘dirt’ look, right? So you need fine crumbs, not giant shards! My absolute favorite way is the freezer bag trick—throw the cookies in a heavy-duty zip-top bag and then use the bottom of a dry measuring cup or a rolling pin to smash them up. It’s super fast, and you get a great texture that mimics potting soil perfectly for your amazing homemade dessert!
Estimated Nutritional Data for Birthday Dirt Cake
Now, I always want to give you guys a ballpark idea of what you’re getting into with this rich, layered goodness. Since we are using a boxed cake mix and package pudding, the exact numbers can shift depending on the brand you grab off the shelf. But based on standard measurements, here’s what you can generally expect per serving of this glorious Birthday Dirt Cake.
Remember, this is a treat, not a health food, so enjoy it guilt-free! It feeds ten people, and trust me, everyone will want seconds. This data is just for reference; think of it as background info while you’re slicing up a big piece.
- Calories: Approximately 450
- Fat: Around 20g
- Saturated Fat: About 10g
- Carbohydrates: Roughly 65g
- Sugar: Around 40g (Yes, it’s sweet!)
- Protein: About 5g
- Fiber: Close to 2g
- Sodium: Approximately 350mg
Just keep in mind that these estimated nutritional values don’t account for any extra candies or larger-than-average scoops of pudding you might generously apply while decorating! For a full breakdown on how we calculate these averages, you can always check out our general nutritional disclaimer page. Happy eating!
Share Your Easy Dessert Ideas
I just love seeing how you all put your spin on this fun recipe! If you made this Birthday Dirt Cake—or if you tried one of the flavor swaps we talked about—please come back and leave a star rating, or better yet, drop a friendly comment below! Tell me what candy you used for decorations or how quickly your crowd devoured it. Getting your feedback helps so much!
If you have questions or want to share a photo, you can always reach out via my contact page. Happy baking, everyone!
By Emily Mitchell, Efficiency & Testing Coordinator at Recipes by Betty.
Birthday Dirt Cake
Equipment
- 9×13 inch baking pan or large serving dish
- Mixing Bowls
Ingredients
For the Cake and Pudding
- 1 box Chocolate cake mix (baked and cooled)
- 2 boxes Chocolate pudding mix Instant type recommended
- 1 L Cold milk For preparing pudding
- 300 ml Whipped topping Thawed
For the Dirt and Topping
- 250 g Oreo cookies Crushed finely
- 1 jar Sprinkles For decoration
- 1 bag Gummy worms For decoration
Instructions
- Bake the chocolate cake according to the package directions. Let the cake cool completely before proceeding.
- Prepare the chocolate pudding using the cold milk as directed on the package until the mixture is thick.
- Gently fold the whipped topping into the prepared pudding until just combined.
- Crumble the cooled cake into small pieces directly into your large serving dish.
- Spread half of the pudding mixture evenly over the cake layer. Sprinkle half of the crushed Oreos on top of the pudding.
- Repeat the layers: remaining pudding, followed by the remaining Oreo crumbs.
- Decorate the top layer with sprinkles and arrange the gummy worms to look like they are coming out of the ‘dirt’.
- Cover the dish and chill the Birthday Dirt Cake for 3 to 4 hours before you serve it. This allows the layers to set.