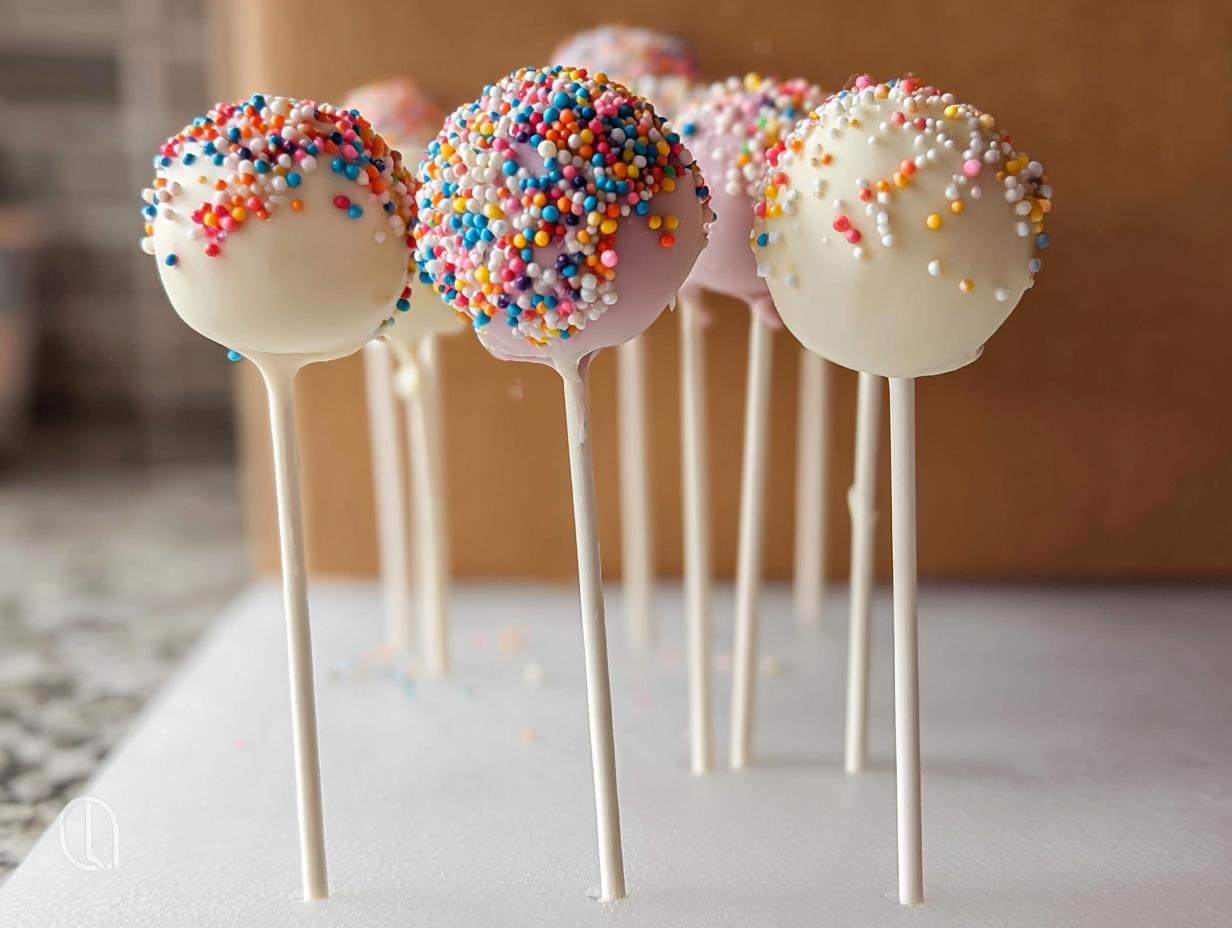
Planning a birthday bash or just need a guaranteed crowd-pleaser that doesn’t involve a massive tiered cake? I totally get it. That’s where my recipe for Birthday Cake Pops swoops in to save the day! They look fancy, but honestly, they are shockingly simple to put together. We’re talking easy desserts with few ingredients here, making them perfect for weeknight baking or massive party prep.

The absolute secret—and I spent way too much time testing this—is getting that inner cake dough texture just right. Once it stops feeling crumbly and feels like sturdy Play-Doh, rolling and dipping are effortless. You end up with these perfectly rounded balls and a smooth, glossy coating every single time. They’re truly the best easy treats for any celebration!
Why These Birthday Cake Pops Are Your New Favorite Easy Treats
When you’re juggling a million party details, you need treats that are reliable, portable, and look amazing without needing hours of fuss. Seriously, these are some of the best no-bake treats you’ll ever whip up!
- They are practically mess-free! No plates or forks required.
- They freeze like a dream, so you can prep days ahead.
- They satisfy your craving for something sweet in one perfect bite.
Perfect Portions for Any Celebration
If you’ve ever tried to slice and serve a standard sheet cake to twenty energetic kids, you know the disaster that ensues. Cake pops solve that problem completely! They are pre-portioned, which instantly makes them one of the easiest dessert ideas for a crowd. Everyone gets exactly one perfect piece!
Achieving Smooth Coatings on Your Birthday Cake Pops
I know what you’re thinking: “My chocolate coating always gets lumpy or cracks when I pull it off the stick.” Don’t worry! The secret to that professional, smooth finish is temperature. Make sure your melted white chocolate isn’t scorching hot when you dip.
I dip mine right after they come out of that short chill time. If the sticks feel cold when you dip them into the warm chocolate, the coating sets instantly and looks flawless. It just takes a quick dunk!
Ingredients Needed for Perfect Birthday Cake Pops
Okay, let’s talk ingredients! Part of what makes these such great easy desserts with few ingredients is that you don’t need a giant shopping list. We are focusing on the core four things needed to make this magic happen, which is terrific when you are trying to find quick desert ideas.
You’ll need one whole vanilla cake—and yes, it absolutely must be cooled completely, preferably baked the day before, because warm cake turns into soup, trust me! Then we need about 120 grams of vanilla frosting to act as our binder. Finally, 300 grams of white chocolate for melting and dipping, plus whatever cute sprinkles you want to use for that festive look.
Ingredient Notes and Substitutions for Homemade Desserts
The cake base is crucial here. Whether you use your favorite family recipe or grab a box mix, make sure it’s fully set and cool. If it’s even slightly warm, the frosting will melt right out of it, and you’ll end up with a sticky mess instead of workable homemade desserts. The frosting is what holds everything together, so don’t skimp on it or try to use too little—that leads to dry, crumbly balls that fall apart. If you want an extra rich base for your cake pops, you can follow the steps for a fantastic frosting base first, like the one found in my sprinkle sugar cookie frosting recipe, and use that instead of plain vanilla!
For example, if you run out of standard vanilla frosting, you can technically use almond bark in a pinch for dipping, but the finish just isn’t as silky smooth. For extra flavor in your cake base, try using a boxed funfetti mix instead of plain vanilla for instant extra sprinkles baked in!
Step-by-Step Instructions for Making Birthday Cake Pops
This is where the fun begins! It might seem like a lot of steps, but honestly, once you get the texture right, these fly by. Remember how I said the consistency was everything? We nail that right at the beginning. This focused attention to detail is what separates a good pop from a fantastic one—it’s all about technique, even in these easy treats! For more fun shapes and ideas, you should check out how I make my monster marshmallow pops for inspiration.
Mixing the Cake Dough for Easy Treats
First thing you have to do is take that cooled vanilla cake and completely obliterate it. I mean, get it down to the finest crumbs possible. A food processor works great for this, but if you don’t have one, just use your hands until you can’t see any large chunks left. Next, we add the frosting. This is the glue! You need just enough frosting—for me, it’s usually about 120 grams—to bring those crumbs together into a thick, pliable dough. If it seems too dry, add frosting by the teaspoon until you can roll a ball in your palm and it holds its shape perfectly without cracking. That’s the ‘dough-like consistency’ we’re aiming for.
Chilling and Inserting Sticks for Clean Shapes
Once you have your dough, roll out 12 evenly sized balls. Try your best to keep them uniform so they bake and dip the same way! Pop these beauties onto a baking sheet and then stick them in the fridge, and this part is non-negotiable: you absolutely need 30 minutes of chilling time. If you try to stick the lollipop sticks into soft cake balls, they crumble, they fall apart, or worse, they pull right out when you dip them! After chilling, just dip the tip of your stick into a little melted chocolate—this acts like cement—and carefully push it halfway into the cake ball. Back into the fridge for five minutes to set that “glue” is always a good idea.
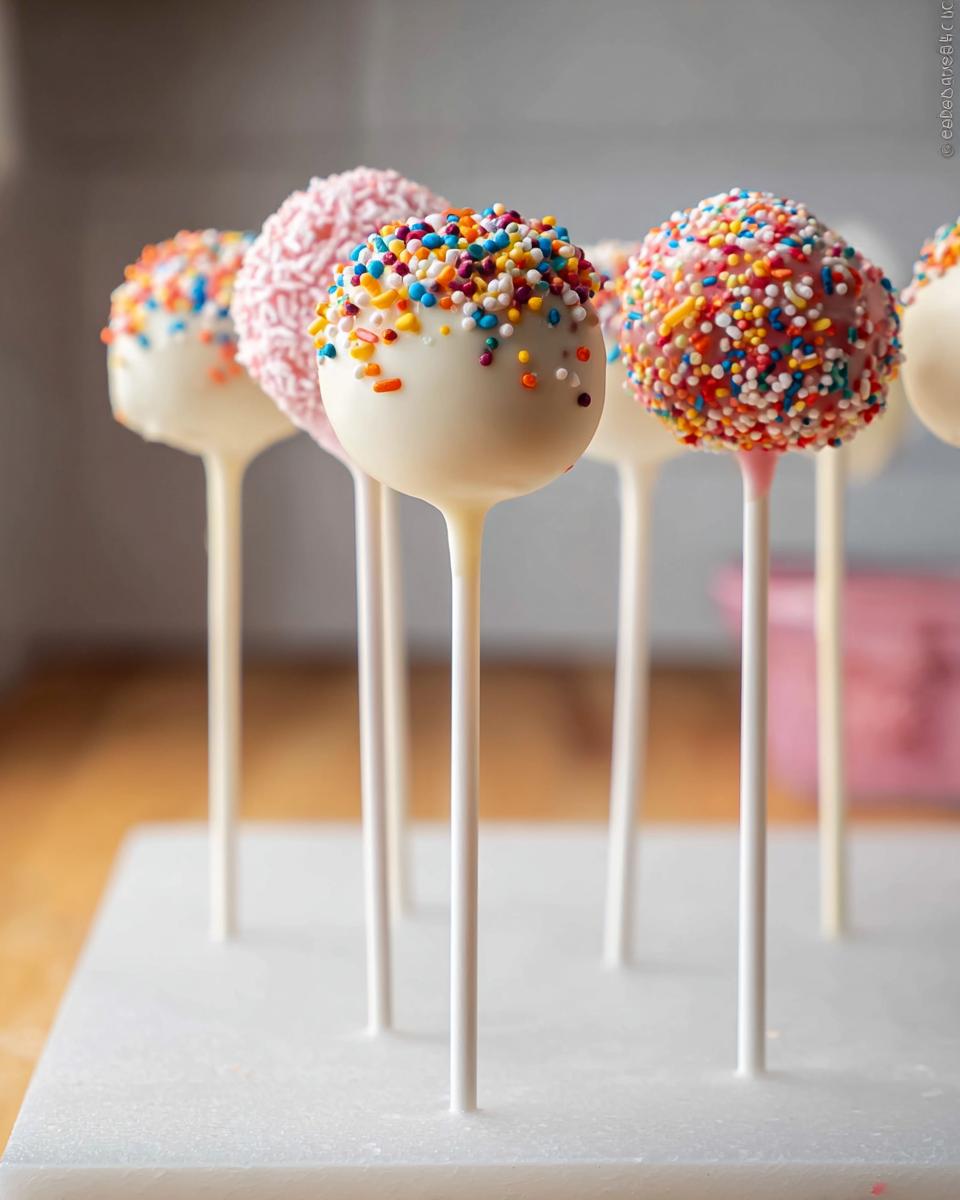
Dipping Technique for Smooth Birthday Cake Pops Coating
Now for the satisfying part! Make sure your white chocolate is melted smoothly. You might want to check out my notes on how I melt chocolate perfectly to avoid seizing. When you dip, hold the stick firmly, lower the cake pop straight down until it’s fully submerged, and then slowly lift it out while gently rotating it. Avoid sweeping motions! You want to let the excess chocolate drizzle off naturally. I like to angle it slightly upward right as I pull it out. Before that chocolate drizzle settles, hit it immediately with those festive sprinkles. If you wait even 30 seconds, the chocolate starts to harden and the sprinkles won’t stick, or you’ll leave little trails behind. Fast and confident dipping is the key to those super smooth coatings!
Tips for Success with Your Birthday Cake Pops
Even with great instructions, sometimes these adorable treats like to throw a little tantrum when you’re trying to get that perfect dip. Since I’ve been there—face-to-face with a melting mess—I’ve gathered a few extra tricks that really cement these as fantastic baking ideas.
First up: preventing cracks in your coating. This usually happens because of a huge temperature difference. If your cake balls are straight out of the fridge (super cold!) and your chocolate is just barely melted (warm!), the rapid temperature change causes stress, leading to those annoying fissures. The fix? Let your chilled cake balls sit on the counter for just five minutes before dipping. You want them cold, but not freezer-cold.
Another huge lifesaver is managing your chocolate longevity. White chocolate can seize up fast, especially if you are making a big batch for a huge party. If you notice your dipping chocolate getting thick, stop immediately! Don’t try to thin it with milk or water, that just makes it worse. Instead, gently re-melt it in the microwave in very short 10-second bursts, stirring well after each burst. Alternatively, if you’re making a huge batch, I always keep a small pot of water simmering on another burner and rest my glass bowl of chocolate right over the steam. It keeps the chocolate perfectly fluid for dipping without ever overheating it.
And finally, if you’re dipping and the chocolate starts clinging too much to the side of the bowl, don’t try to scrape it off the pop! Just gently tilt the bowl on its side so you have a shallow pool of chocolate. This allows you to roll the pop slightly into the chocolate rather than dunking it deep, which creates a much thinner, less bulky coating. I promise, these little tweaks move these from being just ‘easy dessert ideas’ to genuinely professional-looking pops!
Storage and Keeping Birthday Cake Pops Fresh
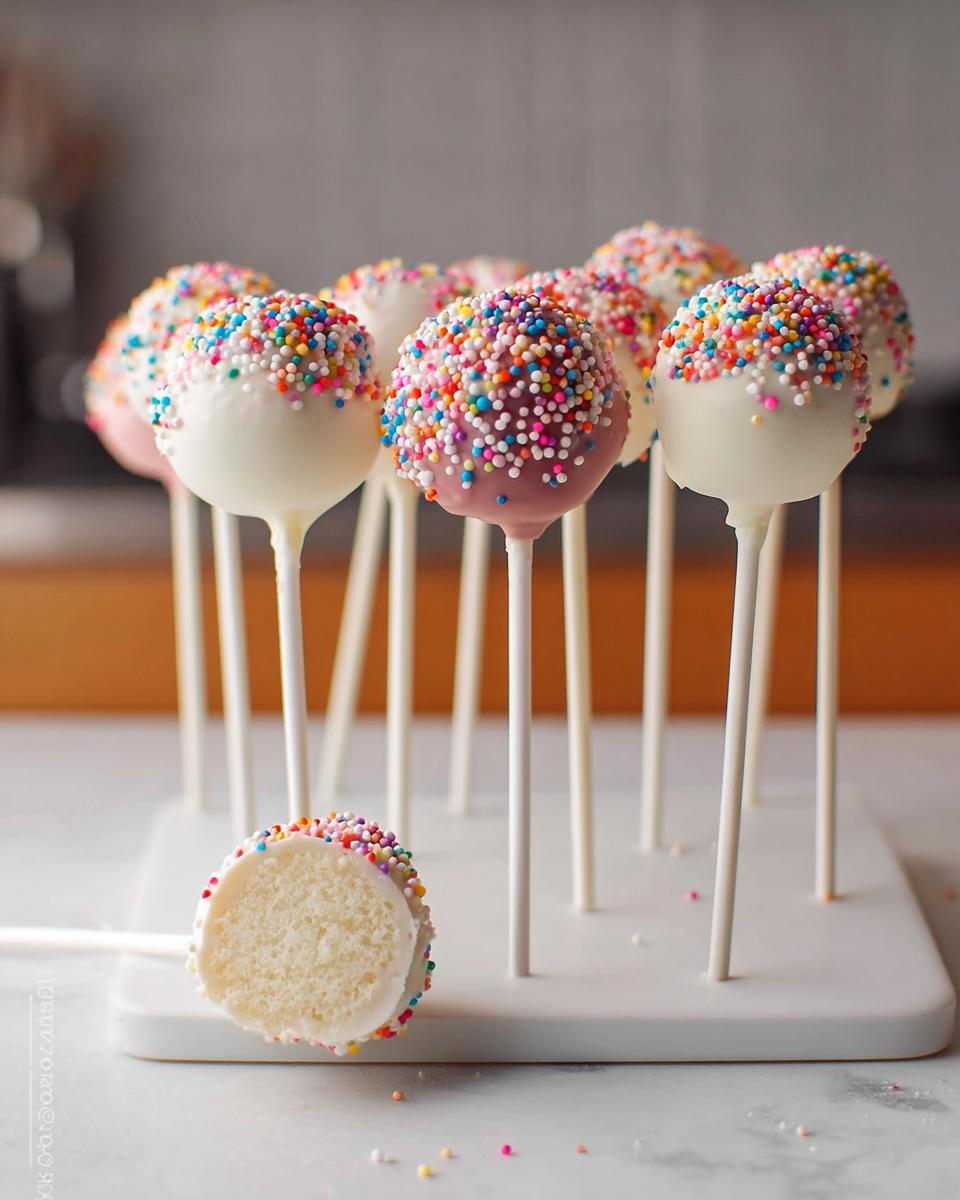
Once you’ve gone to all that effort of rolling and dipping—and trust me, perfect Birthday Cake Pops are worth it—you need to know how to keep them looking amazing until party time! The good news is these are pretty resilient little guys. Since there’s no real custard or dairy in the cake/frosting part, they are generally forgiving.
For short-term storage, say, if you are serving them the same day or the next afternoon, room temperature is totally fine. Just keep them somewhere cool, away from direct sunlight or any heat sources that might melt that gorgeous white chocolate shell. I usually pop mine onto an old piece of styrofoam or just stand them vertically in a tall mason jar or decorative vase when setting them out. They look so cute displayed!
Now, if you need to keep them longer than 24 hours, the fridge is your safest bet. Pop them into an airtight container—this is critical! If you don’t use a container, the fridge air can dry out the cake inside and sometimes cause condensation on the chocolate shell when you pull them out later. You only need about an hour at room temperature before serving if they’ve been chilled, just to take the chill off so they aren’t rock hard when biting into them.
Honestly, I’ve kept these airtight in the fridge for nearly a week, and they’ve been perfectly fine. If you want to go super long-term, they actually freeze really well, too! Wrap them gently first in plastic wrap, then foil, and they’ll be great for up to two months. Forget about reheating, though; just thaw them slowly in the fridge overnight before you plan to serve them.
Frequently Asked Questions About Easy Desserts With Few Ingredients
I always get so many questions once people see how simple these are to make! It just goes to show that you don’t need a hundred steps or specialty items to create amazing homemade desserts. Here are a few things I hear most often when people are looking for simple desert ideas.
Can I use pre-made cake mix for Birthday Cake Pops?
Please, yes! That’s exactly what I often do when I’m rushing to get something together. Using a good quality box mix is one of the biggest secrets to why these qualify as easy dessert ideas. Bake it according to the box directions, let it cool *completely*, and then you just crumble it up. If your box mix results in a very crumbly cake once baked, you might need to add just a tiny splash of milk or an extra teaspoon of frosting to make sure it holds together when you roll it. It’s perfectly fine and keeps the prep time way down!
What is the best way to keep cake pops from falling off the stick?
This is the scariest moment, right? You pull the pop out of the chocolate, and the whole thing slides right down onto your parchment paper like a sad, melted snowman. The absolute best tip here relates back to the ‘cement’ I mentioned in the instructions. Before dipping, take your lollipop stick and dip the tip about an inch deep into your melted chocolate. Then, push that chocolate-coated tip about halfway into your chilled cake ball. Pop it back into the fridge for five minutes to let that chocolate glue set up solid. Once that stick is firmly cemented in place, I guarantee the cake ball won’t fall off during the dipping process!
Honestly, if you follow that one small step, you won’t have any trouble. These are some of the most dependable easy desserts with few ingredients because you can rely on the structure once you build it correctly!
Estimated Nutritional Data for Birthday Cake Pops
So, you want to know the damage? Since these are packed with vanilla cake, rich frosting, and a thick white chocolate coating, they definitely fall into the ‘treat’ category! But hey, we’re making these for celebrations, not for daily snacks, so indulge a little!
Based on using standard boxed vanilla cake mix, commercial vanilla frosting, and semi-sweet white chocolate, here’s a very rough estimation for one of these beautiful Birthday Cake Pops. Remember, because we are making homemade desserts, slight variations in ingredient brands can change things!
- Calories: Approximately 250–300 per pop
- Fat: Around 14g (mostly from the chocolate coating)
- Protein: About 3g
- Carbohydrates: Roughly 30g
These estimates are for one decorated pop, fully coated. If you are using a very rich, homemade cake and heavy cream frosting, the numbers will swing higher, but the general profile remains a nice little sugar rush perfect for parties. Don’t forget these are just ballpark figures, especially since the serving size can vary slightly when you roll them by hand!
Share Your Birthday Cake Pops Creations
Whew! Now that you have this fantastic, easy recipe for Birthday Cake Pops, I really want to see what you create! We all know that baking is more fun when you have someone to show off to, am I right? Since these are so versatile, I love seeing the wild color combinations people come up with.
Did you go classic pink and blue for a first birthday? Or maybe you tried to make them look like tiny little cookies? Let me know how they turned out! Drop a star rating right down below the recipe card—it really helps other bakers know these are trustworthy easy treats.
If you had any major wins (or maybe a funny disaster in the dipping stage that you can laugh about now!), please share your thoughts in the comments section. I read every single one and love hearing how these simple desserts fit into your celebrations. Seriously, don’t be shy! If you snap a picture of your final batch, tag me on social media so I can cheer you on. Happy baking, everyone!

Birthday Cake Pops
Equipment
- Mixing Bowl
- Baking Sheet
Ingredients
- 1 vanilla cake homemade or boxed, baked & cooled
- 120 g vanilla frosting
- 300 g white chocolate melted
- Sprinkles
Instructions
- Crumble the cooled cake into fine crumbs.
- Mix the cake crumbs with the frosting until the mixture forms a dough-like consistency.
- Roll the mixture into small balls and place them on a baking sheet. Chill for 30 minutes.
- Insert sticks into the chilled cake balls.
- Dip each cake pop into the melted white chocolate, coating completely.
- Decorate immediately with sprinkles before the chocolate sets.
- Let the cake pops set completely before you serve them.