
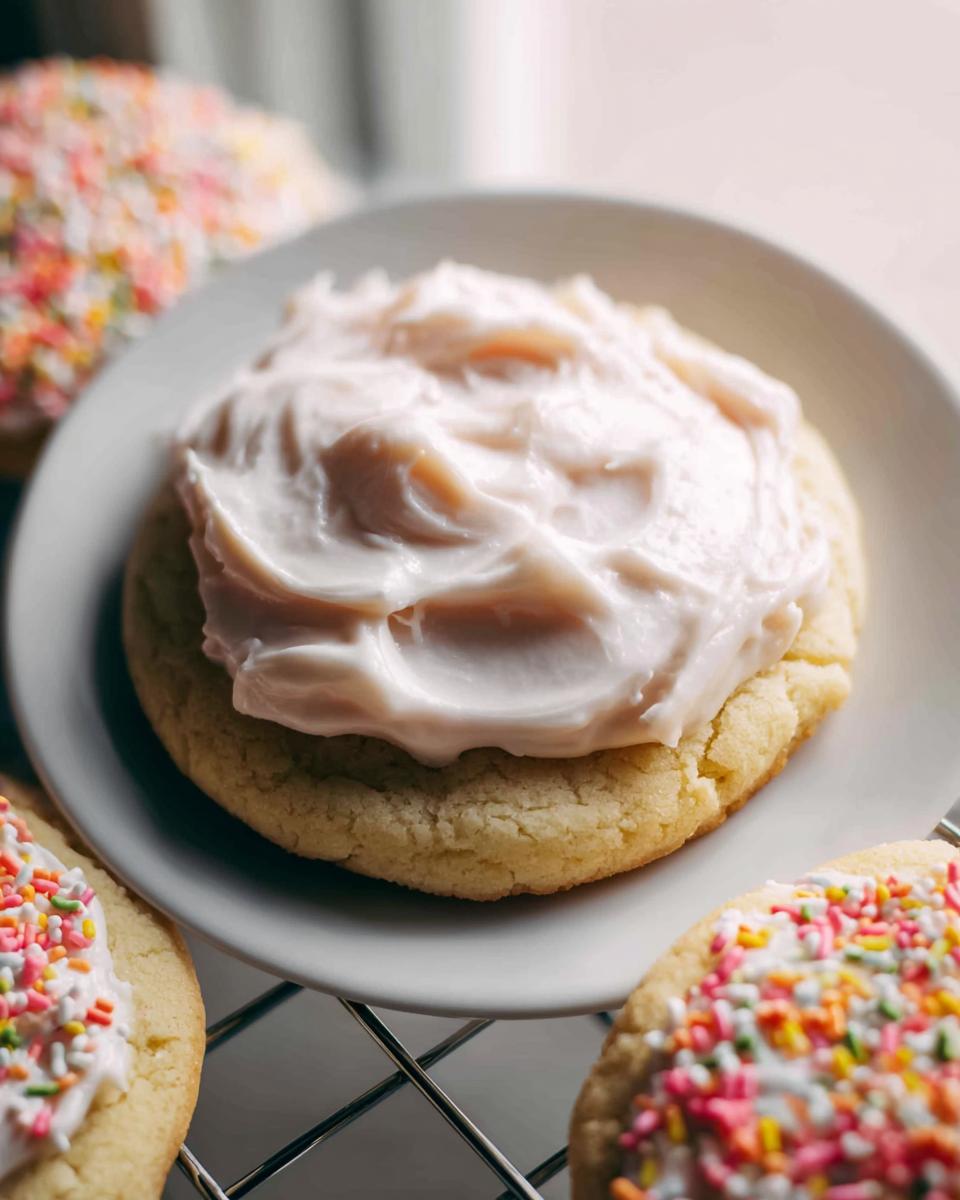
If you’re anything like me, you’ve stared longingly at those perfectly coated cookies in the bakery window. You know the ones—they look so smooth and glossy, like tiny works of art? Well, stop dreaming, because I finally cracked the code to that professional finish! This simple recipe delivers the most gorgeous **Bakery-Style Sugar Cookie Frosting** you’ll ever whip up at home. Perfecting this frosting reminded me how much presentation matters; once the cookies were frosted, they instantly looked bakery-ready. It’s so fast to make, too. You really won’t believe how easy these **easy dessert ideas** are to elevate!
Why This Bakery-Style Sugar Cookie Frosting is Your New Go-To
Honestly, I used to settle for thin, crumbly icing, but not anymore! This frosting changes everything for your **homemade desserts**. It dries down just right, which means you can stack them without making a huge mess. Trust me, these **easy treats** deliver a huge ‘wow’ factor for minimal effort.
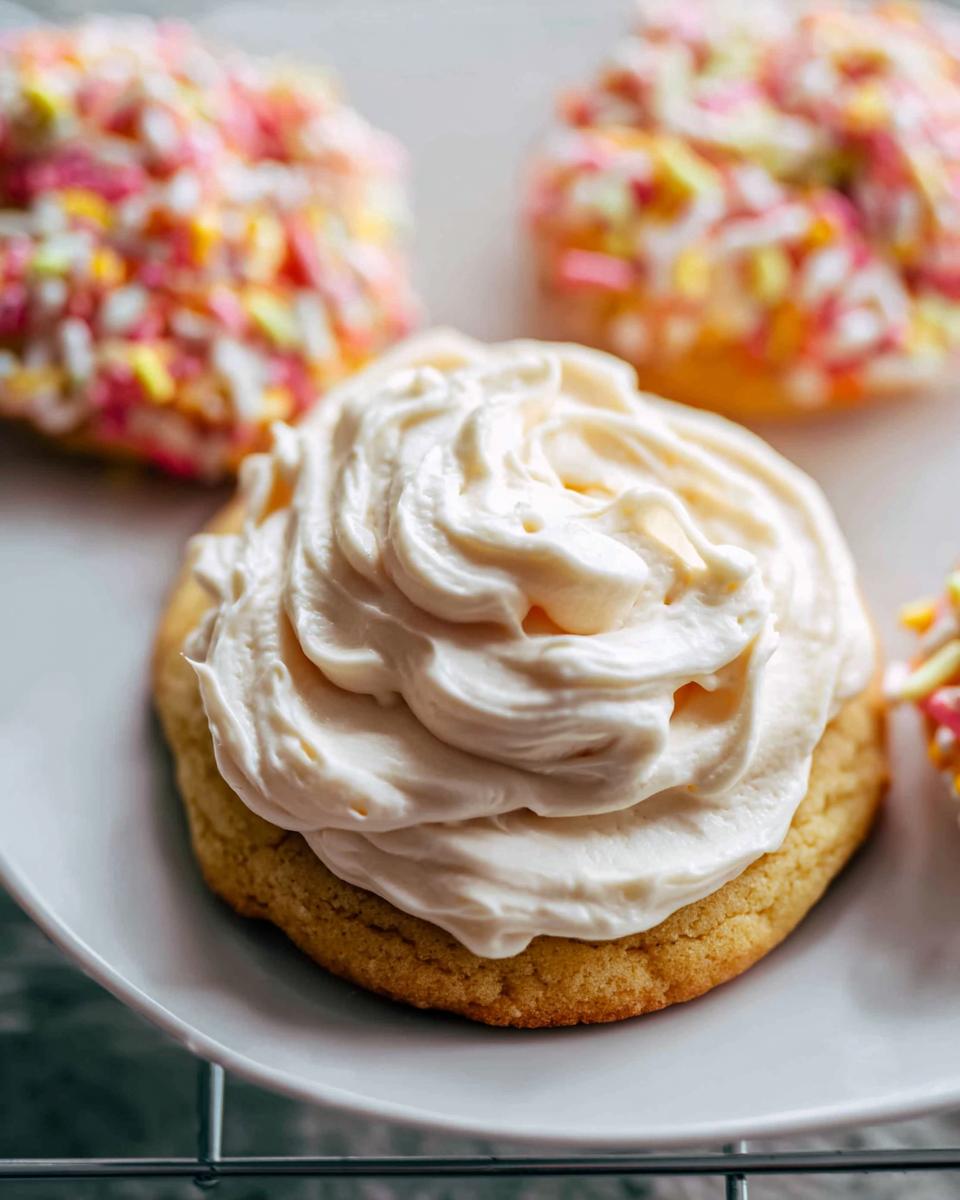
- It sets beautifully, giving you that signature, professional gloss.
- It tastes like pure, sweet vanilla happiness.
- It’s fantastic for flooding cookies or just spreading on thick for creamy goodness.
If you love decorating but hate the fuss, you have to give this magic a try. You can even check out my recipe for sprinkle sugar cookie frosting if you want something extra fun!
Essential Ingredients for Perfect Bakery-Style Sugar Cookie Frosting
Getting the right texture for this frosting means paying close attention to what goes in. Don’t try to skimp here; these simple ingredients are what make it look like it came straight from a high-end bakery shelf. We aren’t using any crazy, hard-to-find stuff here, which is why this works so well for quick **easy desserts with few ingredients**!
You absolutely need butter that is perfectly softened—I mean, press your finger in and it leaves a gentle dent, but it’s not melty or greasy. That’s key for beating air in! Make sure your powdered sugar is sifted too; nobody wants lumps in their glossy coating.
- 120g of softened Butter
- 250g of Powdered Sugar (sifted is best!)
- 1 to 2 tablespoons of Milk or Cream (we use cream when we want it extra rich)
- 1 teaspoon of Vanilla Extract (the good stuff makes a difference!)
- Optional: Food coloring if you’re aiming for bright Easter colors or anything besides classic white.
For extra tips on the base cookie itself, you should check out the classic sugar cookie recipe over at King Arthur Baking. But trust me, even the best cookie needs this spectacular frosting!
Equipment Needed for Your Bakery-Style Sugar Cookie Frosting
Okay, I know what you’re thinking: complicated baking needs complicated gadgets. Nope! That’s the beauty of this recipe. You don’t need a fancy stand mixer if you don’t have one, but if you do—use it! This frosting comes together so quickly when you have the right tools, making it one of those truly satisfying **easy dessert ideas**.
Grab these two basics:
- Electric Mixer: Whether it’s a handheld model or the big stand mixer, this is non-negotiable for properly creaming the butter and whipping air into the sugar. If you’re mixing by hand, make sure that butter is *really* soft, and prepare for a good arm workout!
- Spatula: You need this for scraping down the sides of the bowl. Don’t skip this step! All the best bits of flavor and texture stick to the sides, and you need to incorporate every speck into your perfect coating.
That’s it! No special piping bags needed unless you want to get really fancy, but for that smooth, professional look, a trusty offset spatula works like a dream for spreading.
Step-by-Step Instructions for Bakery-Style Sugar Cookie Frosting
This is where the magic happens! You’re going from basic butter and sugar to that dreamy, glossy coating in about ten minutes flat. Just follow these easy steps, and you’ll have a batch ready for decorating in no time. Seriously, these are such great **baking ideas** when you need something fast but impressive.
- First up, get your mixer going! You need to beat that softened butter until it’s completely smooth and creamy. Don’t rush this part; we need that smooth base for the gloss later on.
- Once the butter is looking perfect, start adding that powdered sugar slowly. I mean *slowly*—if you dump it all in at once, it’s going to look like a snowstorm hit your kitchen!
- Now, pour in your vanilla extract and that splash of milk. Beat everything together until the frosting looks light, fluffy, and perfectly spreadable. It should swirl nicely on your spatula.
- Listen closely, because this is how you nail the texture: If it’s too stiff, add milk, just a tiny bit at a time, until you reach that perfect consistency. Too thin? Add a little more powdered sugar! That little adjustment is the secret weapon for the perfect spread.
- Use it right away! Slather it on your cooled cookies. If you aren’t ready to decorate, pop it in the fridge, but remember to let it warm up a tiny bit before you start spreading, or it will fight you.
If you enjoy foolproof recipes that turn out amazing every time, you might also get a kick out of my tips on making the perfect scones—it’s all about technique!
For a different take on vanilla frosting, check out this recipe from Betty Crocker, too: Vanilla Buttercream Frosting.
Tips for Success with Bakery-Style Sugar Cookie Frosting
You can have the best cookie recipe in the world, but if your frosting slumps or cracks, you won’t get that amazing bakery look. My biggest piece of advice for these **Baking Ideas** is temperature control. Seriously, the battle starts with the butter!
Don’t Use Cold or Melted Butter
I cannot stress this enough: your butter needs to be perfectly softened. If it’s too cold, it won’t cream properly, and you’ll end up with stiff, lumpy frosting that’s impossible to spread smoothly. If it’s melted, your frosting will be greasy and won’t set up right at all. You want it pliable, like soft clay, just the right consistency to hold air when you beat it.
Fixing Off-Consistency Frosting
Oops, maybe you added too much milk? Don’t panic! This is so common. If your frosting is too thin to hold its shape, just beat in a tablespoon of powdered sugar at a time until it stiffens up again. If it seems overly stiff or crumbly—perhaps you added too much sugar initially—slowly drizzle in cream or milk, a tiny splash (about half a teaspoon) at a time while the mixer is running on low.

A perfect texture means it should hold a soft peak on your spatula but still spread easily without tearing up the cookie surface. For a slightly different method, you can look at this great recipe for basic sugar cookie icing online, but remember, the butter to sugar ratio here is what gives us that signature glossy finish!
Variations on Your Bakery-Style Sugar Cookie Frosting
This **Bakery-Style Sugar Cookie Frosting** is fantastic as is—that classic vanilla is unbeatable! But why stop there? Once you master the base, you open up a whole world of **Unique Cookie Recipes** for the holidays or just for fun. It’s so easy to switch up the flavor profile just by changing the extract you use.
Flavor Swaps Using Extracts
Swapping vanilla is the quickest trick in the book. For gorgeous holiday cookies, ditch the vanilla and use almond extract instead. Just a teaspoon provides that wonderful marzipan-like flavor. Sometimes I even use a mix of half vanilla and half almond for a really complex taste!
If you are making lemon cookies, obviously you need to lean into that citrus. Swap the vanilla for a teaspoon of lemon extract, but here’s the real secret: use lemon juice instead of milk when you start adjusting the consistency. It brightens everything up beautifully!
Easy Ways to Color Your Frosting
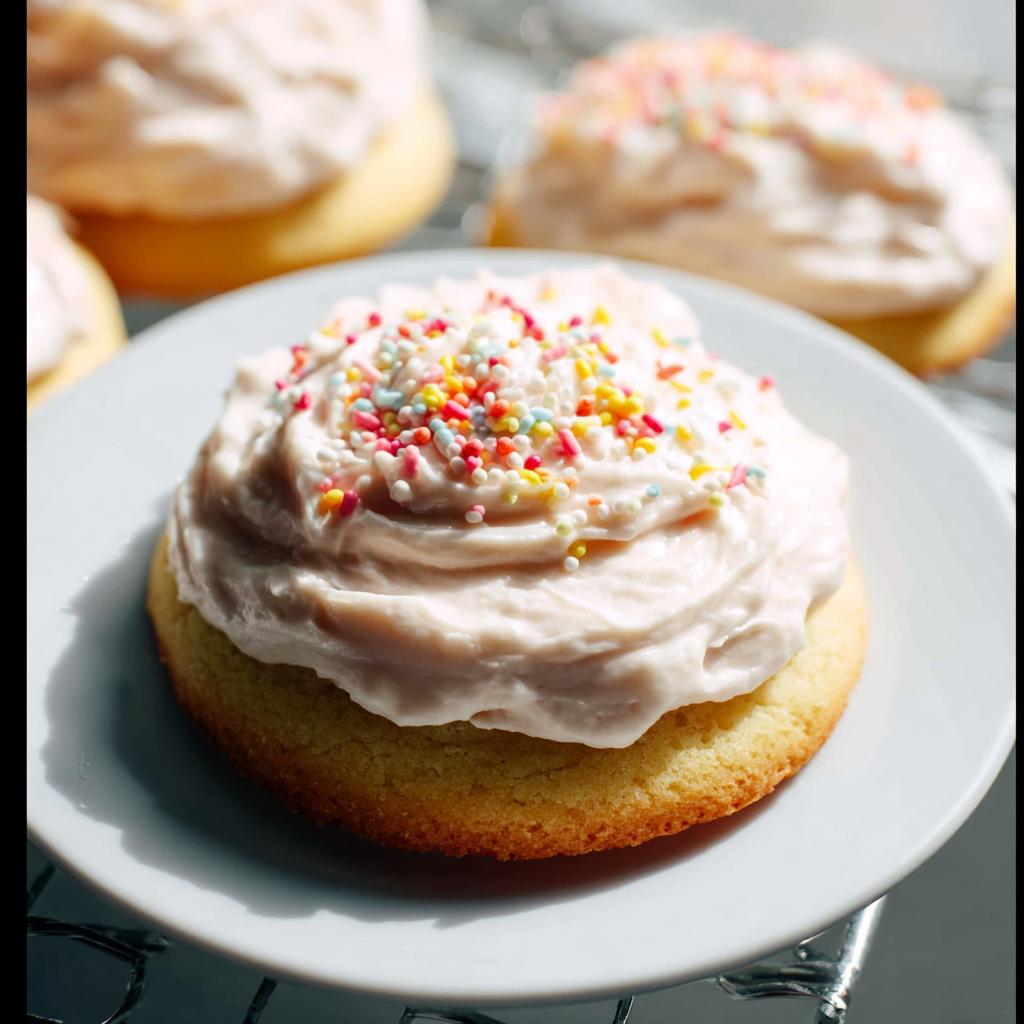
Coloring is where you can really have fun, especially if you are making treats for a party. I usually use gel food coloring because the liquids can mess with your perfect consistency (remember how important that smoothness is?).
If you want soft pastels, just dip the tip of a toothpick into the gel and stir it into a small amount of frosting first. You can always add more color, but you can’t take it out! I love dying a small bit bright pink and mixing it back into the white batch right at the end for a lovely, marbled effect. Talk about **easy dessert ideas**!
Serving and Storing Your Bakery-Style Sugar Cookie Frosting
So, you’ve frosted your cookies to perfection! Now what? The best part about this **Bakery-Style Sugar Cookie Frosting** is that it holds up beautifully, making it perfect for those big gatherings. If you end up with leftovers, or if you need to prep ahead for **easy desserts for a crowd**, storage is simple.
Storing Leftover Frosting
If you have extra frosting, stick it in an airtight container and pop it in the fridge. Just remember what I mentioned earlier: the cold temperature causes it to stiffen up quite a lot. When you take it out to use later, let it sit at room temperature for at least thirty minutes to soften back up before you even think about trying to spread it!
Best Ways to Serve
These cookies are amazing right on their own, but they are also fantastic paired with other simple treats. If you’re loading up a platter for a big gathering, these decorated cookies look wonderful next to anything else you bake. For even more inspiration on easy things that please a crowd, take a peek at the wonderful collection of best sugar cookie recipes online. Don’t forget, you can always save your frosting and use it later on another batch of those easy treats!
Frequently Asked Questions About Bakery-Style Sugar Cookie Frosting
I know you might have a few lingering questions! Making frosting can seem fussy, but this **Bakery-Style Sugar Cookie Frosting** is honestly so straightforward. If you’re looking for **simple desserts**, this is the answer for a truly polished look without the headache.
How long does this frosting last?
If you store it in an airtight container in the fridge, it should be good for about a week. The butter is the most perishable part, so keeping it sealed is vital. Just remember my earlier warning: let it sit out until it’s back to room temperature; otherwise, it will be way too hard to spread smoothly over your cookies. This makes it a great option for preparing ahead of time!
Why is my frosting grainy even after beating it?
Graininess almost always comes down to the powdered sugar not being mixed in enough, or sometimes, the sugar itself wasn’t fine enough to begin with. You need to beat it for a solid minute or two after the milk goes in until you see that glossy sheen. If it’s slightly grainy, it’s still a perfectly delicious **easy dessert idea**, but for that silky bakery texture, keep mixing!
Can I use this frosting for piping designs instead of spreading?
You can! This recipe is slightly softer than royal icing—it’s more of a smooth buttercream finish. If you want defined piping like tiny flowers, you need to reduce the milk down significantly, maybe just a teaspoon total, making it much stiffer. For flood icing designs, you’ll need to add more liquid so it spreads itself out flat. If piping is your main goal, you might want to check out tried-and-true royal icing recipes, like the one found at Better Homes & Gardens!
Is there a way to make this look like a marbled cookie design?
Absolutely! This is one of the most fun **easy dessert ideas**. Just divide your total batch into two bowls. Keep one bowl white, and dye the second bowl a vibrant color. Then, place dollops of both colors right next to each other on the cookie, and use an offset spatula to swirl them gently once for a beautiful, unique marbled effect. For more inspiration on quick, delicious desserts, check out my recipe for no-bake strawberry mousse!
Estimate Nutritional Data for This Bakery-Style Sugar Cookie Frosting
Now, I’m not a nutritionist, not by a long shot! But since folks always ask, I’ve run the numbers through a calculator to give you a ballpark idea of what’s in this single batch of gorgeous **Bakery-Style Sugar Cookie Frosting**. Keep in mind, this is just an estimate for the whole batch before you even put it on cookies. Depending on how thick you spread it, the final numbers on your treat will vary wildly, but it’s good to have a starting point!
This breakdown is based on dividing the total recipe yield (one batch) into standard serving sizes. Remember, this is just the frosting itself, not the cookie underneath!
- Calories: Approximately 1800 – 2000 per batch
- Fat: Around 45g – 50g (Hello, butter!)
- Saturated Fat: About 30g
- Carbohydrates: Roughly 350g – 380g (Mostly from the powdered sugar)
- Sugar: Most of those carbs are sugar, unsurprisingly!
- Protein: Very minimal, less than 2g
If you’re making **simple desserts** like this, the focus is usually on taste and looks, not nutrition counts, but I always appreciate knowing the general breakdown. I hope this helps you plan your treats! Just enjoy that perfect, smooth finish!
Bakery-Style Sugar Cookie Frosting
Equipment
- Electric mixer
- Spatula
Ingredients
- 120 g Butter, softened
- 250 g Powdered sugar
- 1 tbsp Milk or cream Use 1 to 2 tablespoons
- 1 tsp Vanilla extract
- As needed Food coloring Optional
Instructions
- Beat the softened butter in a mixer until it becomes smooth and creamy.
- Gradually add the powdered sugar to the butter mixture.
- Add the vanilla extract and milk. Beat until the frosting is fluffy and spreadable.
- Adjust the thickness by adding more powdered sugar for a stiffer consistency or more milk for a thinner consistency.
- Use the frosting immediately on your cookies, or refrigerate it until you are ready to decorate.