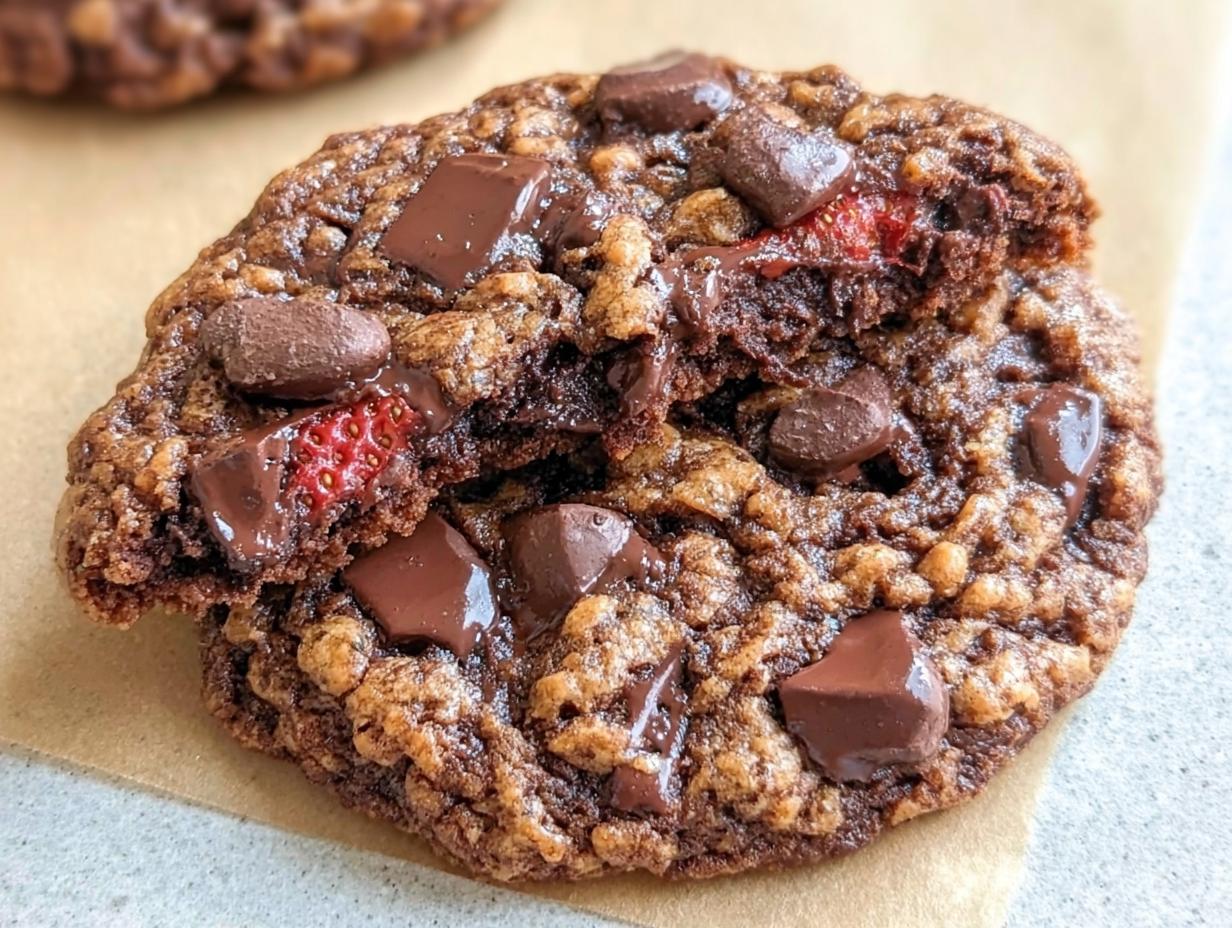
You know that moment when you bite into a soft, thick chocolate cookie and realize it tastes exactly like your favorite indulgence from that fancy local bakery? Getting that texture at home used to feel like a secret only professionals knew, but I cracked the code! Forget flat, sad cookies. We are making genuine Bakery-Style Chocolate Cookies here, and the secret really boils down to handling the temperature of the dough and being spot-on with the bake time.

Honestly, measuring matters here more than usual. I spent weeks testing slight variations because I wanted these cookies to have that perfect, slightly underbaked center and that beautiful structural crown. If you’re looking for incredible homemade desserts that don’t require complicated steps, you might also love my flourless chocolate cookies recipe. When you see how thick these turn out, you’ll agree all the precision was worth it. If you’re ready to see how easy these homemade desserts really are, let’s get started!
Why These Bakery-Style Chocolate Cookies Are Your New Favorite Easy Treats
I know you’ve got a stack of recipes for chocolate cookies, but trust me, these are different. Why spend time on something when you can make something truly impressive? If you need quick, reliable recipes for parties this is IT!
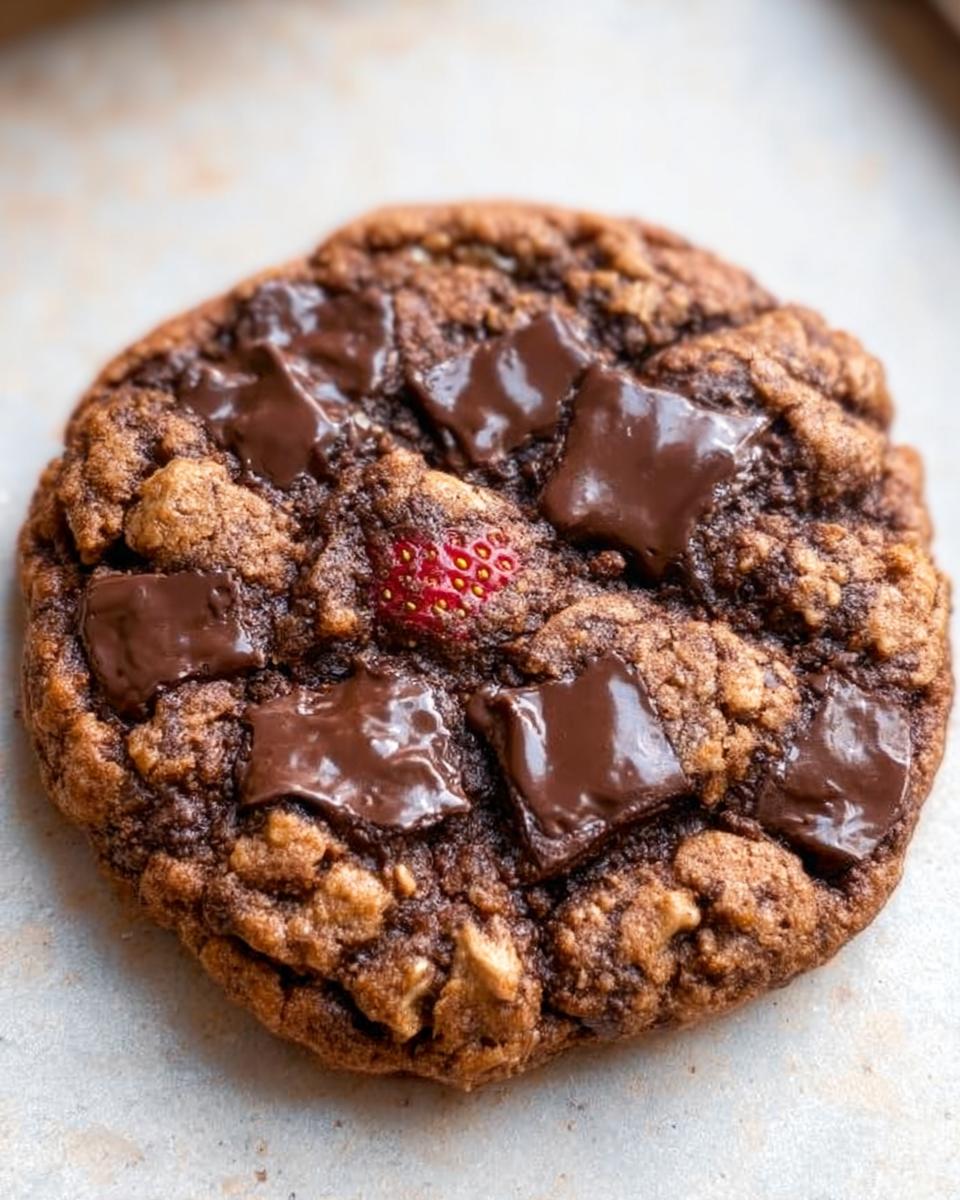
- They come out perfectly thick every single time—no more flat frisbees!
- They taste like they came straight from a high-end bakery, making them excellent Easy Treats.
- You only need a handful of pantry staples, fitting right in with Simple Desserts ideas.
- They freeze beautifully, so you can always have Easy Desserts For A Crowd ready to go.
If you want to see more amazing recipes like this, check out my full collection of dessert recipes here. You won’t be disappointed!
Gathering Ingredients for Perfect Bakery-Style Chocolate Cookies
Okay, we are heading into the serious part now. For cookies to look professional, we have to treat our measurements like gold. This recipe is fantastic because it feels fancy but actually qualifies as one of those wonderful Easy Desserts With Few Ingredients! Getting the wet and dry components ready separately first is crucial. It’s my standard rule for baking anything, really, because it prevents mishaps later on.
When you get your ingredients out, just check everything once. Make sure your butter is actually softened—not melted!—and that your chocolate chunks are high quality. Seriously, the chocolate makes or breaks a chocolate cookie, right? Let’s get organized! Also, if you’re wondering about salt choices for this recipe, I have a little breakdown on kosher salt versus sea salt that might help you decide exactly what to grab.
Dry Ingredients for Bakery-Style Chocolate Cookies
Go ahead and grab one of your mixing bowls—a medium one will do—and measure these out carefully:
- 280 g all-purpose flour
- 1 tsp baking soda
- 1/2 tsp salt
Now, take a whisk and give these a really good, thorough mix! You want the baking soda evenly distributed so you don’t end up with a salty or oddly risen bite somewhere. Whisk it for about 30 seconds, then set it aside.
Wet Ingredients & Mix-ins for Bakery-Style Chocolate Cookies
This bowl is where the magic happens—it’s going to get nice and fluffy! Remember, we need that butter softened, which means if you forgot to take it out, you can cut it into small cubes and leave it on the counter for five minutes while you grab your sugars.
- 170 g unsalted butter, softened
- 150 g brown sugar
- 100 g white sugar
- 2 eggs
- 2 tsp vanilla extract
- 250 g chocolate chunks
For the chocolate, I always recommend chunks or high-quality chopped bars over standard chips. You want those varying sizes melting pockets in your final cookie. That’s the bakery look we’re chasing!
Step-by-Step Instructions for Bakery-Style Chocolate Cookies
Okay, now that everything is measured and ready to go, putting this together is fairly quick! Don’t rush the mix, but also don’t let the dough sit around once the flour is in—that’s what makes cookies sad and flat. We are building structure here, so precision pays off. If you want tons of behind-the-scenes technique on how to avoid common baking pitfalls, check out my thoughts on scone secrets; it applies perfectly here too!
Preparing the Oven and Dry Mix for Bakery-Style Chocolate Cookies
Rule number one: get that oven hot! Preheat your oven right now to 180°C / 350°F. While that heats up, let’s focus on the dry bowl we set aside.
Take your bowl containing the flour, baking soda, and salt. Whisk it until it is completely homogenous. This dry blend needs no lumps! Seriously, take a good 30 seconds just to ensure everything is evenly distributed before we move on.
Creaming and Combining Wet Ingredients for Bakery-Style Chocolate Cookies
Time to bring out the mixer! Beat that softened butter with both the brown sugar and the white sugar. You need to mix this until it gets noticeably lighter in color and fluffy—that takes about two minutes, depending on your mixer speed. That fluffiness traps the air we need for lift!
Next, drizzle in the two eggs, one at a time, mixing just until each one disappears. Then, add the vanilla extract. Don’t overmix once the eggs are in; we just want everything smoothly blended together before moving on to the flour.
Final Dough Assembly and Scooping
Now, carefully add your dry mixture into the wet mixture little by little. Mix on low speed, or fold by hand, only until the streaks of flour *just* disappear. Stop mixing right then! If you see a few white flecks, don’t panic; they’ll go away when you fold in the chocolate.
Gently fold in those gorgeous chocolate chunks. When scooping, use a large scoop—we want substantial cookies! Scoop large mounds of dough onto your prepared baking sheet. These need space to grow, so give them good inches between each one. Don’t flatten them down at all!
Baking and Resting Time for Bakery-Style Chocolate Cookies
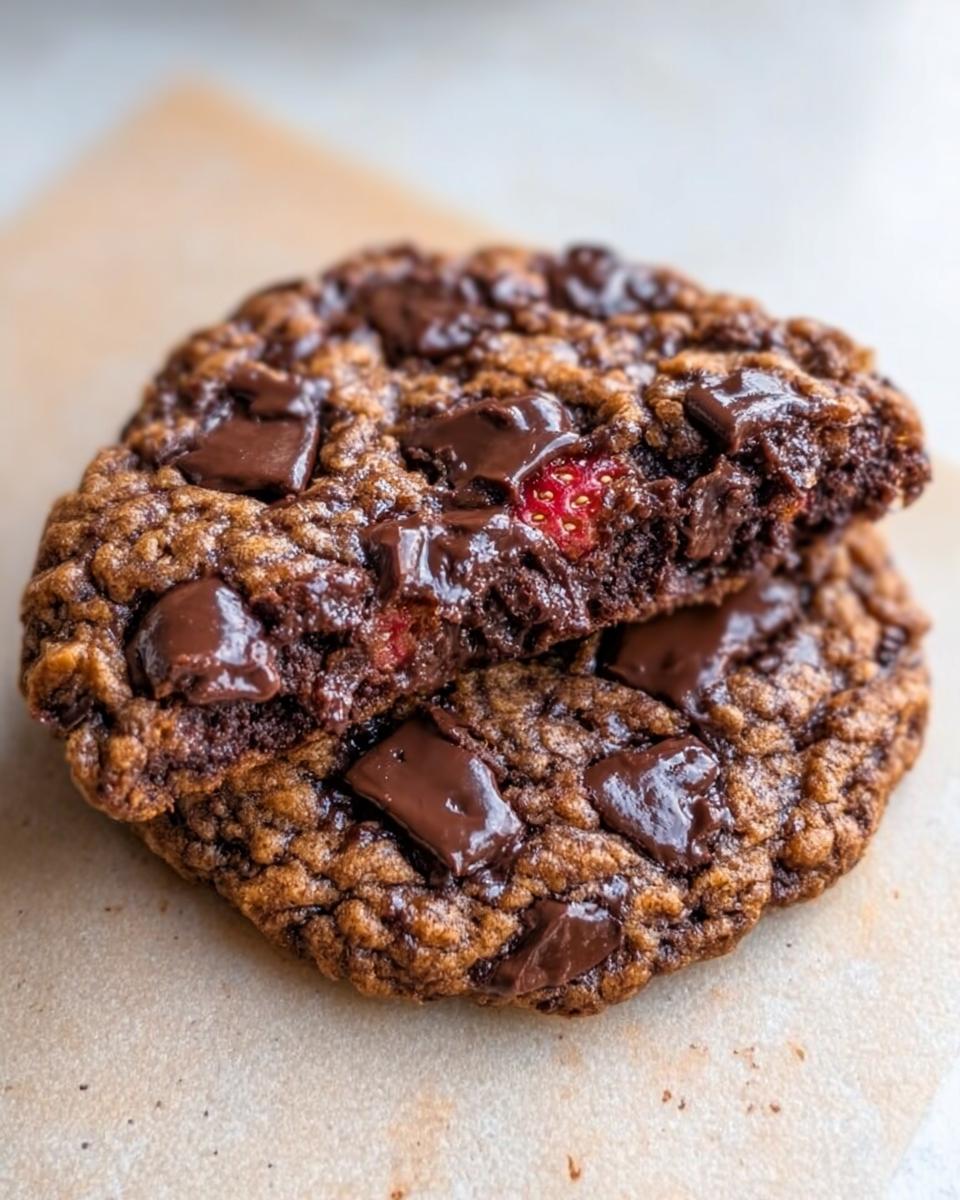
Now, pop them into the preheated oven. Bake them for 10 to 12 minutes. Keep a close eye on them; the edges should look set, but the center will still look slightly soft and puffy. That’s what we want for chewy centers!
This next step is non-negotiable for that famous bakery structure. Leave the cookies right on that hot baking tray for a full 5 minutes! They are still cooking very gently, and this rest period lets them set up perfectly so they don’t collapse or fall apart when you move them. After that rest time, carefully transfer them over to a cooling rack to finish cooling down. If you want to check out other great tips on cookie textures, Joy of Baking has some fantastic resources over here.
Tips for Achieving True Bakery-Style Chocolate Cookies Texture
This is where we move from following a recipe to actually knowing *how* to bake. Remember how I mentioned dough temperature and bake time were my focus? Those little details separate a good cookie from a show-stopping one! If you want to nail these as some of the best Baking Ideas you’ve ever tried, you really need to listen up.
Honestly, my biggest breakthrough came from treating the dough temperature like a sacred rule. If your kitchen is warm, or if your butter wasn’t quite cool enough when creaming, they will spread into those sad, flat discs. I experimented a ton! For ultimate thickness, I recommend chilling your scooped cookie dough balls for just 15 minutes before they hit the oven. This minor step firms up the butter again, giving those cookies the structure they need to rise up instead of spreading out wide. Take a peek at why those trendy cookies are so thick; it’s similar science!
Don’t rely on the timer alone for bake time, either. You need to look! Pull them out the instant those edges look set and golden brown, but the center still looks puffy and just a tiny bit soft. That’s what guarantees that wonderful chewy interior. Also, never skip the 5-minute tray rest! That time allows the cookie structure to solidify before you move them. For more classic advice on texture perfection, you can read some great tips Martha Stewart shares over on her site. Trust me, these expert tricks make all the difference in getting that professional finish.

Ingredient Notes and Substitutions for Bakery-Style Chocolate Cookies
When you’re aiming for bakery quality, even the ingredients you might usually overlook deserve a little attention. I want to be super clear about what goes into these so you get that fantastic, dense texture that makes these some of our best Unique Cookie Recipes. Two ingredients, in particular, dictate how these cookies behave in the oven.
First, let’s talk sugar. We use both brown sugar and white sugar, and they do different jobs! Brown sugar, with its molasses content, is crucial for moisture and chewiness. It keeps the cookie soft internally. The white sugar, on the other hand, helps the cookies spread just enough and encourages those crispy outer edges. If you were to substitute just one, always keep the brown sugar! If you are out of brown sugar, you can actually substitute the white sugar portion with extra brown sugar, but don’t swap out the brown sugar for white, or they’ll flatten too much.
Second: the chocolate! I insisted on chunks, but if you only have chips, it’s okay to use them, though the melt won’t be quite as gooey. If you want to get adventurous, try mixing your chocolate chunks with some toffee bits or use a blend of milk and dark chocolate. When you’re looking for unique dessert ideas, sometimes a small mix-in upgrade is all you need to make a recipe feel totally new. For more tips on adjusting components in recipes, you can look into how I approach my 7-layer bars recipe—it’s all about balancing textures!
Serving Suggestions for Your Homemade Desserts
Now that you have these incredible, thick, bakery-quality beauties, how are you going to serve them up? As the ultimate Homemade Desserts, they honestly need very little help, but why stick to just eating them plain? If you’re feeling extra indulgent—and you totally should be—serve one or two cookies slightly warmed up with a big scoop of vanilla bean ice cream. Seriously, that warm, gooey chocolate pouring out is magnificent!
They are also perfect arranged prettily on a large platter alongside a glass of cold milk for an easy afternoon treat. This recipe makes enough that they are truly wonderful Easy Dessert Ideas for feeding a crowd! For more inspiration on presentation across all courses, check out my main desserts page!
Storage and Reheating Instructions for Bakery-Style Chocolate Cookies
You worked so hard making these perfect, thick cookies, so we definitely don’t want to waste a single one! Luckily, because we used a good amount of butter and they are so substantial, they actually store really well, which is fantastic news for your meal prepping.
The best way to keep these cookies fresh is simply to let them cool down completely first. Do not try to store them warm—that traps moisture and makes them get gummy, and we fought too hard for that bakery structure to ruin it with steam!
Once they are totally cool, layer them in an airtight container. You can stack them, but I like putting a small piece of parchment paper between layers if I’m stacking more than three high, just to be safe so the chocolate doesn’t stick together. Keep the container sealed tight at room temperature. They will stay fresh and perfectly chewy like this for about three to four days. Think of them as your secret weapon for quick snacks all week long!
If you are looking for ways to incorporate these into weekly eating plans or just want some ideas on how to pack them up, you might find some good tips over on my post about meal prep snack boxes. They pack up beautifully!
Restoring That Fresh-From-the-Oven Quality
If your cookies have been sitting for a couple of days, they are still amazing, but sometimes you just crave that fresh-out-of-the-oven melt. Reheating is so simple, it barely counts as extra work!
To warm them up, pop one or two cookies onto a microwave-safe plate. Heat them for just 10 to 15 seconds. Be careful not to push it past 20 seconds, or you risk drying them out or making the chocolate lava in a messy way! This quick blast of heat softens the butter just enough to release that amazing warm aroma right before you take a bite.
For a slightly crispier edge, you can also pop them on a baking sheet in a 300°F oven for about three minutes. Either way, they come back to life instantly, tasting like you just pulled them off the tray five minutes ago. It’s the easiest way to enjoy these amazing homemade desserts again and again!
Frequently Asked Questions About Bakery-Style Chocolate Cookies
When you follow a recipe this precise, sometimes questions pop up anyway, especially when you’re aiming for true bakery perfection! It’s totally normal, and I want to make sure you have zero issues making these delightful cookies. We built these to be fantastic Easy Dessert Ideas, but let’s tackle any last-minute worries you might have about getting that perfect thick result.
Why do my Bakery-Style Chocolate Cookies spread too much?
Oh, spreading is the enemy of the thick cookie! Usually, this means one of two things happened: either your butter was too warm when you creamed it, or your oven wasn’t quite hot enough. That soft butter melts too fast in the heat and the dough just oozes out instead of setting up tall. If this happens, try this quick fix: as soon as you pull the tray out of the oven (after the 5-minute rest, remember!), use a large cookie cutter that’s slightly smaller than the baked cookie and gently circle the outside edge of each cookie. This pushes the soft edges back in and forces the cookie to look taller! It’s a little trick I use when I get impatient.
Can I chill the dough before baking my Bakery-Style Chocolate Cookies?
Yes! Actually, yes, yes, yes! While this recipe works fine without chilling, if you want them even thicker and you have time on your side, chilling is your best friend. Chilling the scooped dough balls for at least an hour—or even overnight—does two amazing things. First, it firms the butter back up, so they spread less. Second, it lets the flour absorb more moisture from the sugars and eggs, which concentrates that rich chocolate flavor we love. It definitely elevates these over basic Simple Desserts!
How do these compare to other Easy Treats?
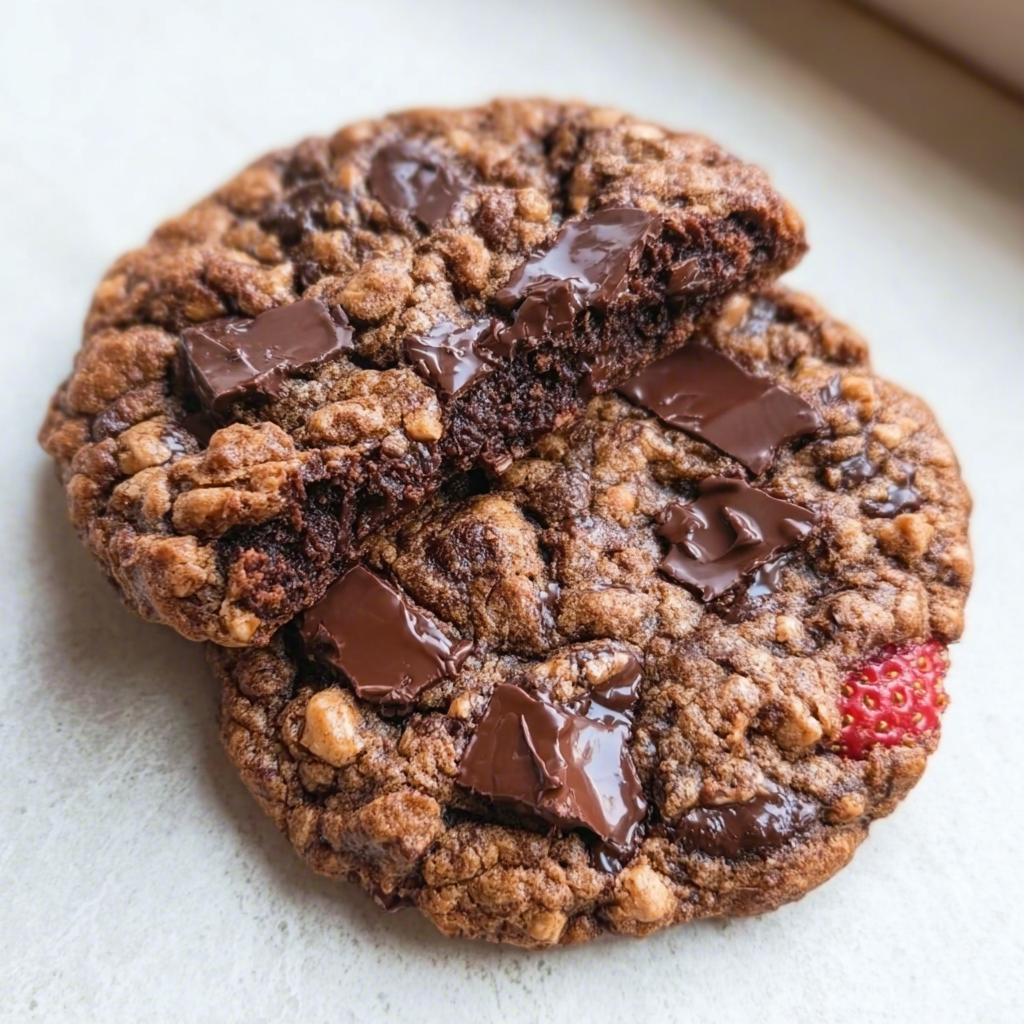
If you’ve made standard ‘drop’ cookies, you know they often spread out thin and get crunchy all the way through. These Bakery-Style Chocolate Cookies are different because of the exact ratios of sugar and butter, and how we strictly control the bake time. Standard Easy Treats often result in a flatter cookie, but ours are engineered to stay puffy. We want that satisfying chewiness in the middle layer paired with a slightly crisp outer shell. They are richer, thicker, and definitely feel more substantial than the average quick treat when you bite into one!
If you have any other burning questions about ingredients or steps, feel free to reach out using my contact page. Happy baking!
Share Your Bakery-Style Chocolate Cookies Experience
Alright, my friends, that’s the end of the technical road for these incredible cookies! I’ve given you all my secrets for achieving that bakery-thick texture, right down to the exact resting time on the tray—I really hope you give this recipe a try!
Baking is so much more fun when you can share the results, so please, don’t be shy! If you made these Bakery-Style Chocolate Cookies and they turned out perfectly thick, I absolutely want to know about it. Did you use the chilling trick? Did you stick to the 12-minute bake time? Drop a comment right down below and tell me how it went!
We build trust here on the site, one delicious, perfectly baked treat at a time. Rating the recipe lets me know exactly which methods worked best for you, too. And if you snapped a picture because they looked just too good to eat (and then you ate them anyway, I know how it is), feel free to tag me on social media! I love seeing your successful homemade projects.
For more stories about our baking philosophy and how we test things endlessly to get you the best results, you can check out the About page. Happy baking until the next batch!
Bakery-Style Chocolate Cookies
Equipment
- Mixing Bowls
- Electric mixer
- Baking Sheet
Ingredients
Dry Ingredients
- 280 g all-purpose flour
- 1 tsp baking soda
- 1/2 tsp salt
Wet Ingredients & Mix-ins
- 170 g unsalted butter, softened
- 150 g brown sugar
- 100 g white sugar
- 2 eggs
- 2 tsp vanilla extract
- 250 g chocolate chunks
Instructions
- Preheat your oven to 180°C / 350°F.
- Mix the flour, baking soda, and salt together in one bowl.
- Cream the softened butter and both sugars together until the mixture is fluffy.
- Add the eggs and vanilla extract to the creamed mixture. Mix until just combined.
- Fold the dry ingredients into the wet mixture. Then, fold in the chocolate chunks.
- Scoop large portions of dough onto a prepared baking sheet.
- Bake for 10 to 12 minutes.
- Let the cookies rest on the baking tray for 5 minutes before moving them to a cooling rack.